Sometimes some additional data should be added to the file. Users often need to know the return policy, sizes table, etc.
Some attachments may additionally impact the marketing campaign and overall engagement to buy products and so need to be
closely investigated for marketing outcome
Embark on an exploration of our extension demo, where you can test its
features firsthand and unlock its full potential. Dive into a world of
possibilities as you navigate through the demo, discovering how our extension
can enhance your experience.
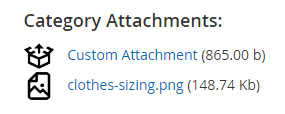
Extension gives merchant an ability to show attachments assigned to products, categories or CMS pages with related icon
and be easily downloaded.
Attachments view
Store Configuration
Configuration can be found in the General ➔ Product Attachment tab with one groups available:
General
Enable Module – Enables or disables module functionality.
Admin Management
All Product Attachments admin functionality is located under the Catalog ➔ Attachments tab menu group.
Extension consists of 2 main parts:
Attachment Icons
Product Attachments
Attachment Icons
Each product attachment has a icon, enhancing visual appeal and quickly indicating the file type. This must be configured beforehand.
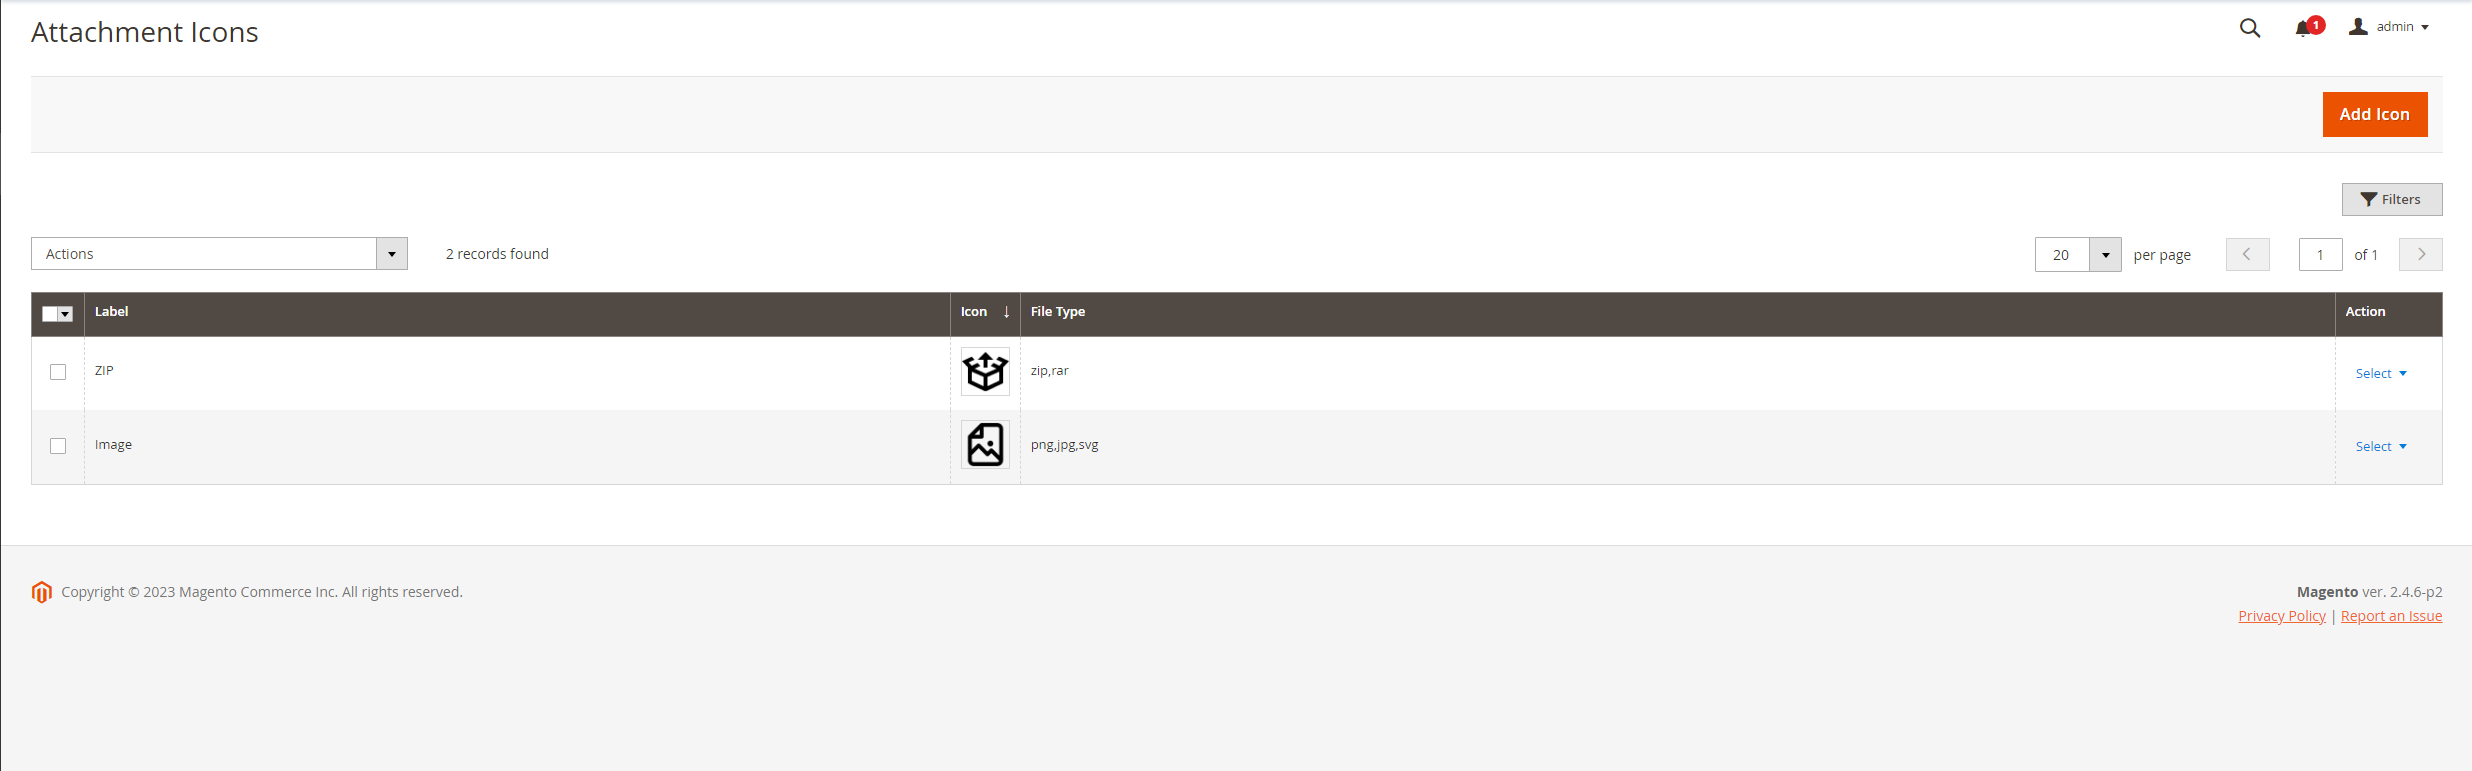
To manage icons, go to Catalog ➔ Attachments ➔ Attachment Icons. A grid displaying all icons will appear, as shown in the image.
Attachment Icons Grid
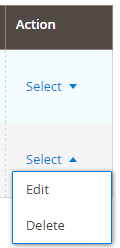
There is a massive actions available for deleting a bunch of icons. Each icon can also be managed separately using the
“Action” column as below:
“Action” column
Select “Edit” option in order to go to icon edit form. Click on the “Add Icon” button in order to create a new icon.
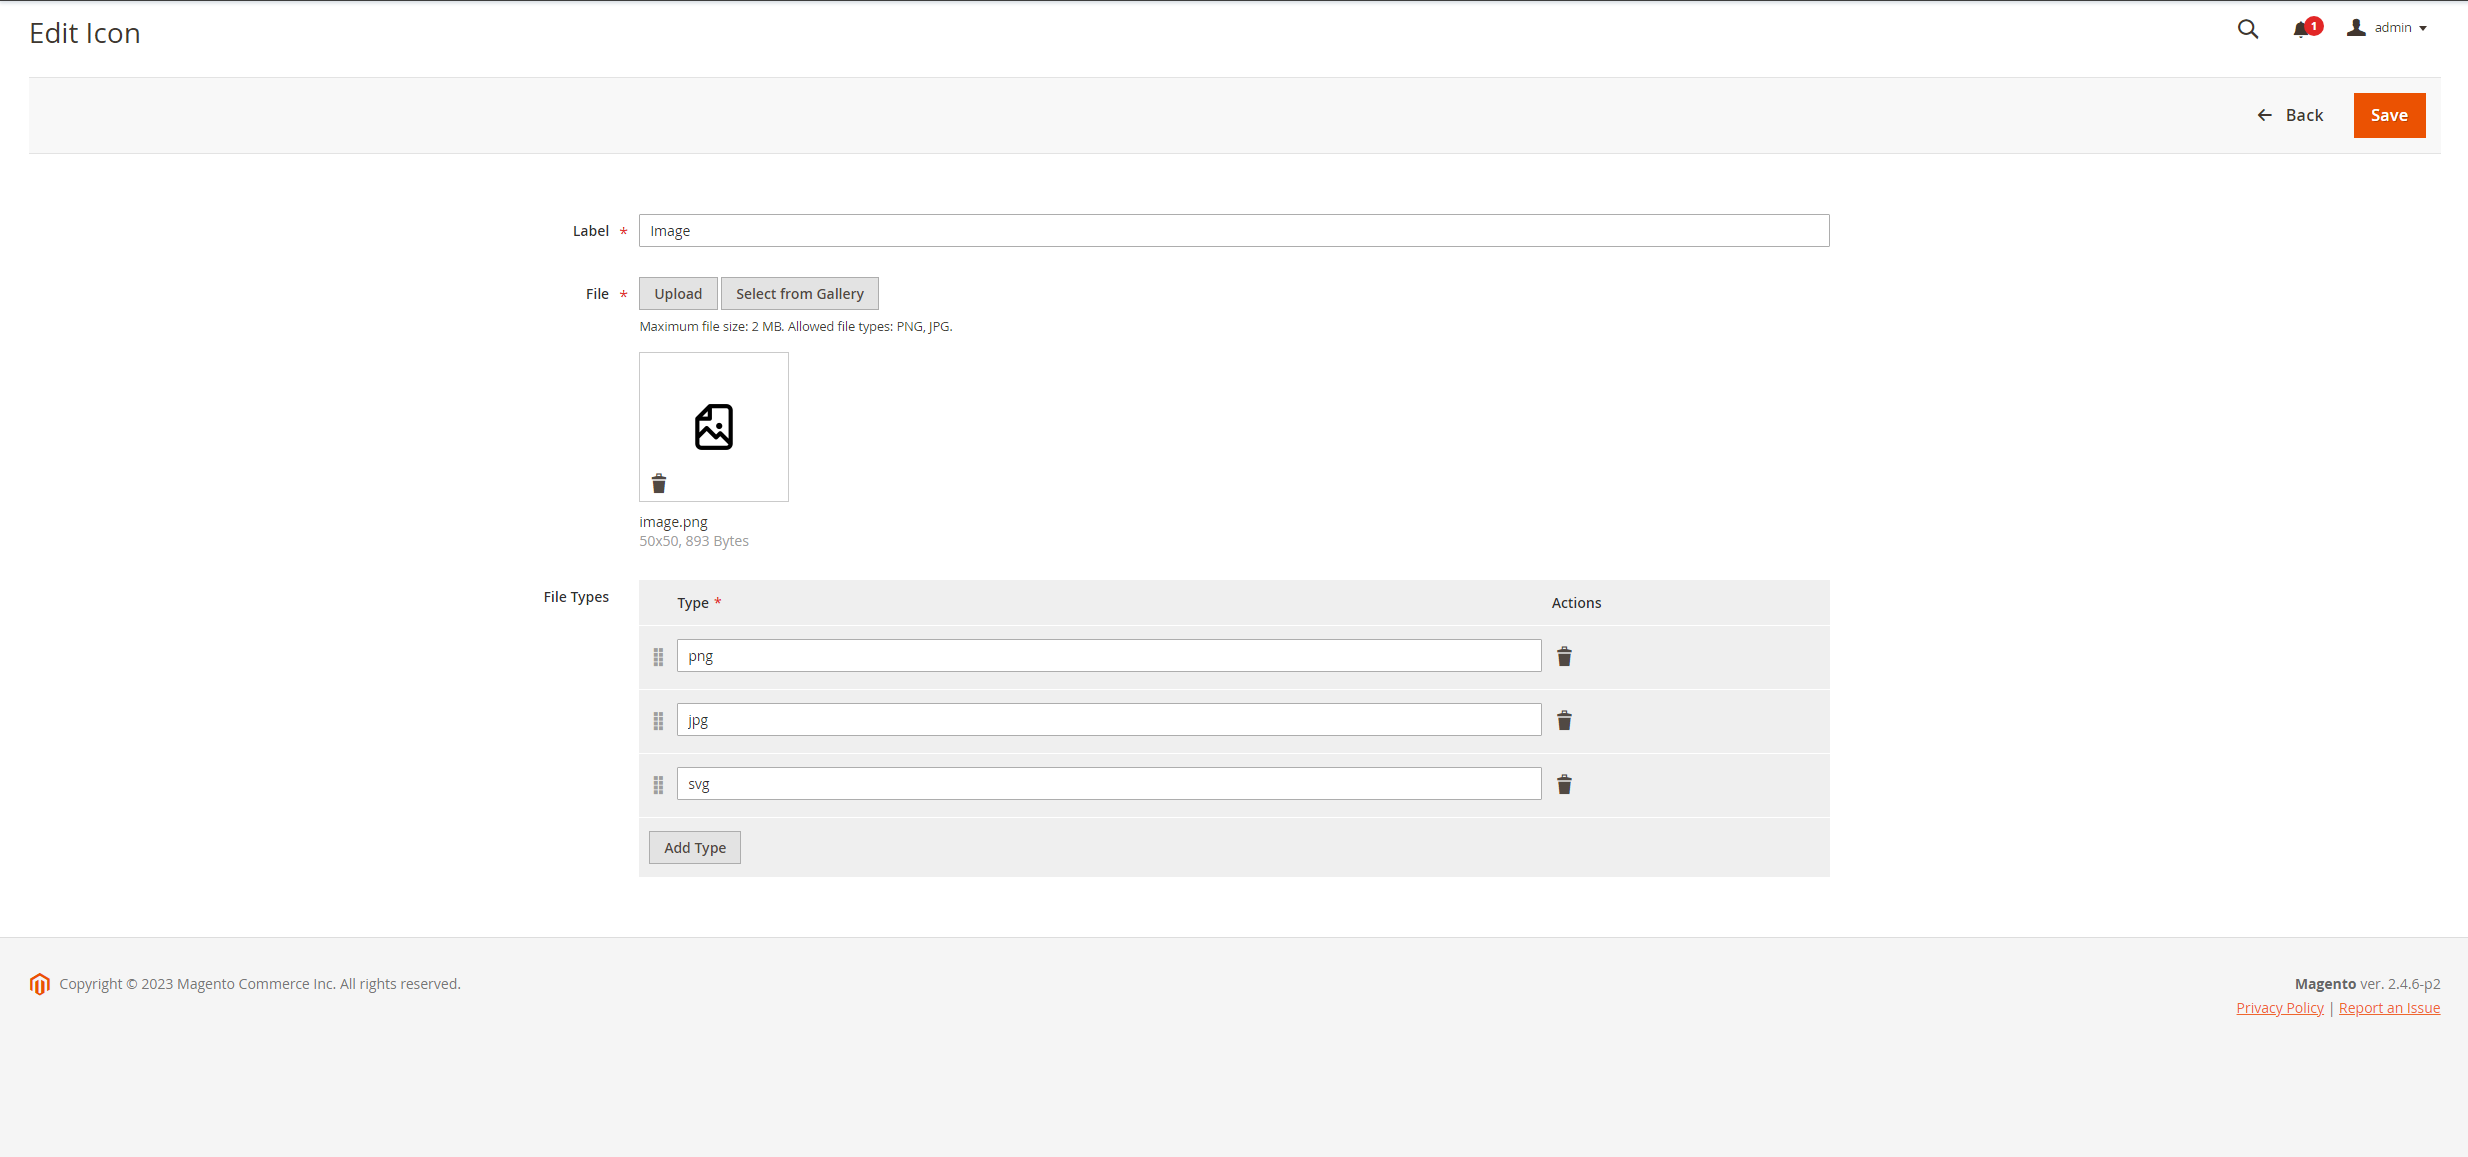
You’ll be redirected to the icon management form page after any of these actions performed:
Icon Form
The following fields are available:
Label. Is used for readable name
File. Icon file
File Types. Supported icon types. Can be added as many ones as needed
Attachments
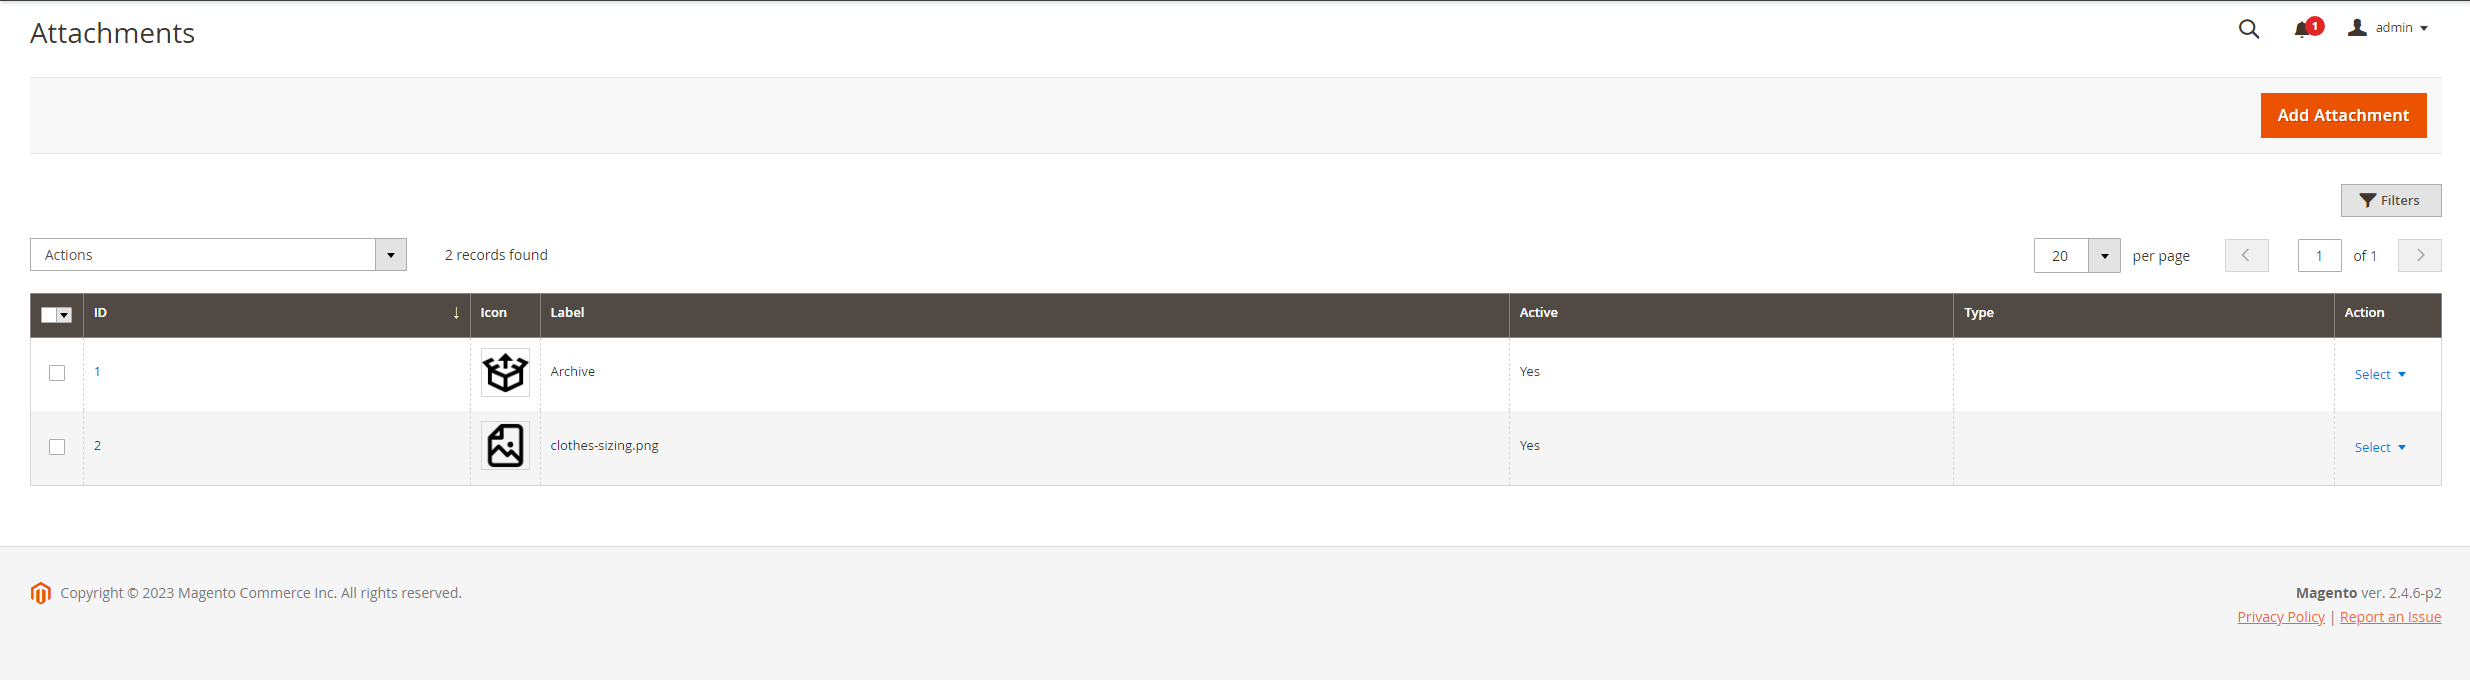
In order to configure attachments behaviour navigate to Catalog ➔ Attachments ➔ Attachments menu link. Grid will be displayed there
with all the attachments listed as shown on the image:
Attachments Grid
There is a massive actions available for deleting a bunch of items. Each of them can also be managed separately using the
“Action” column as below:
“Action” column
Select “Edit” option in order to go to the attachment edit form. Click on the “Add Attachment” button in order to create a new one.
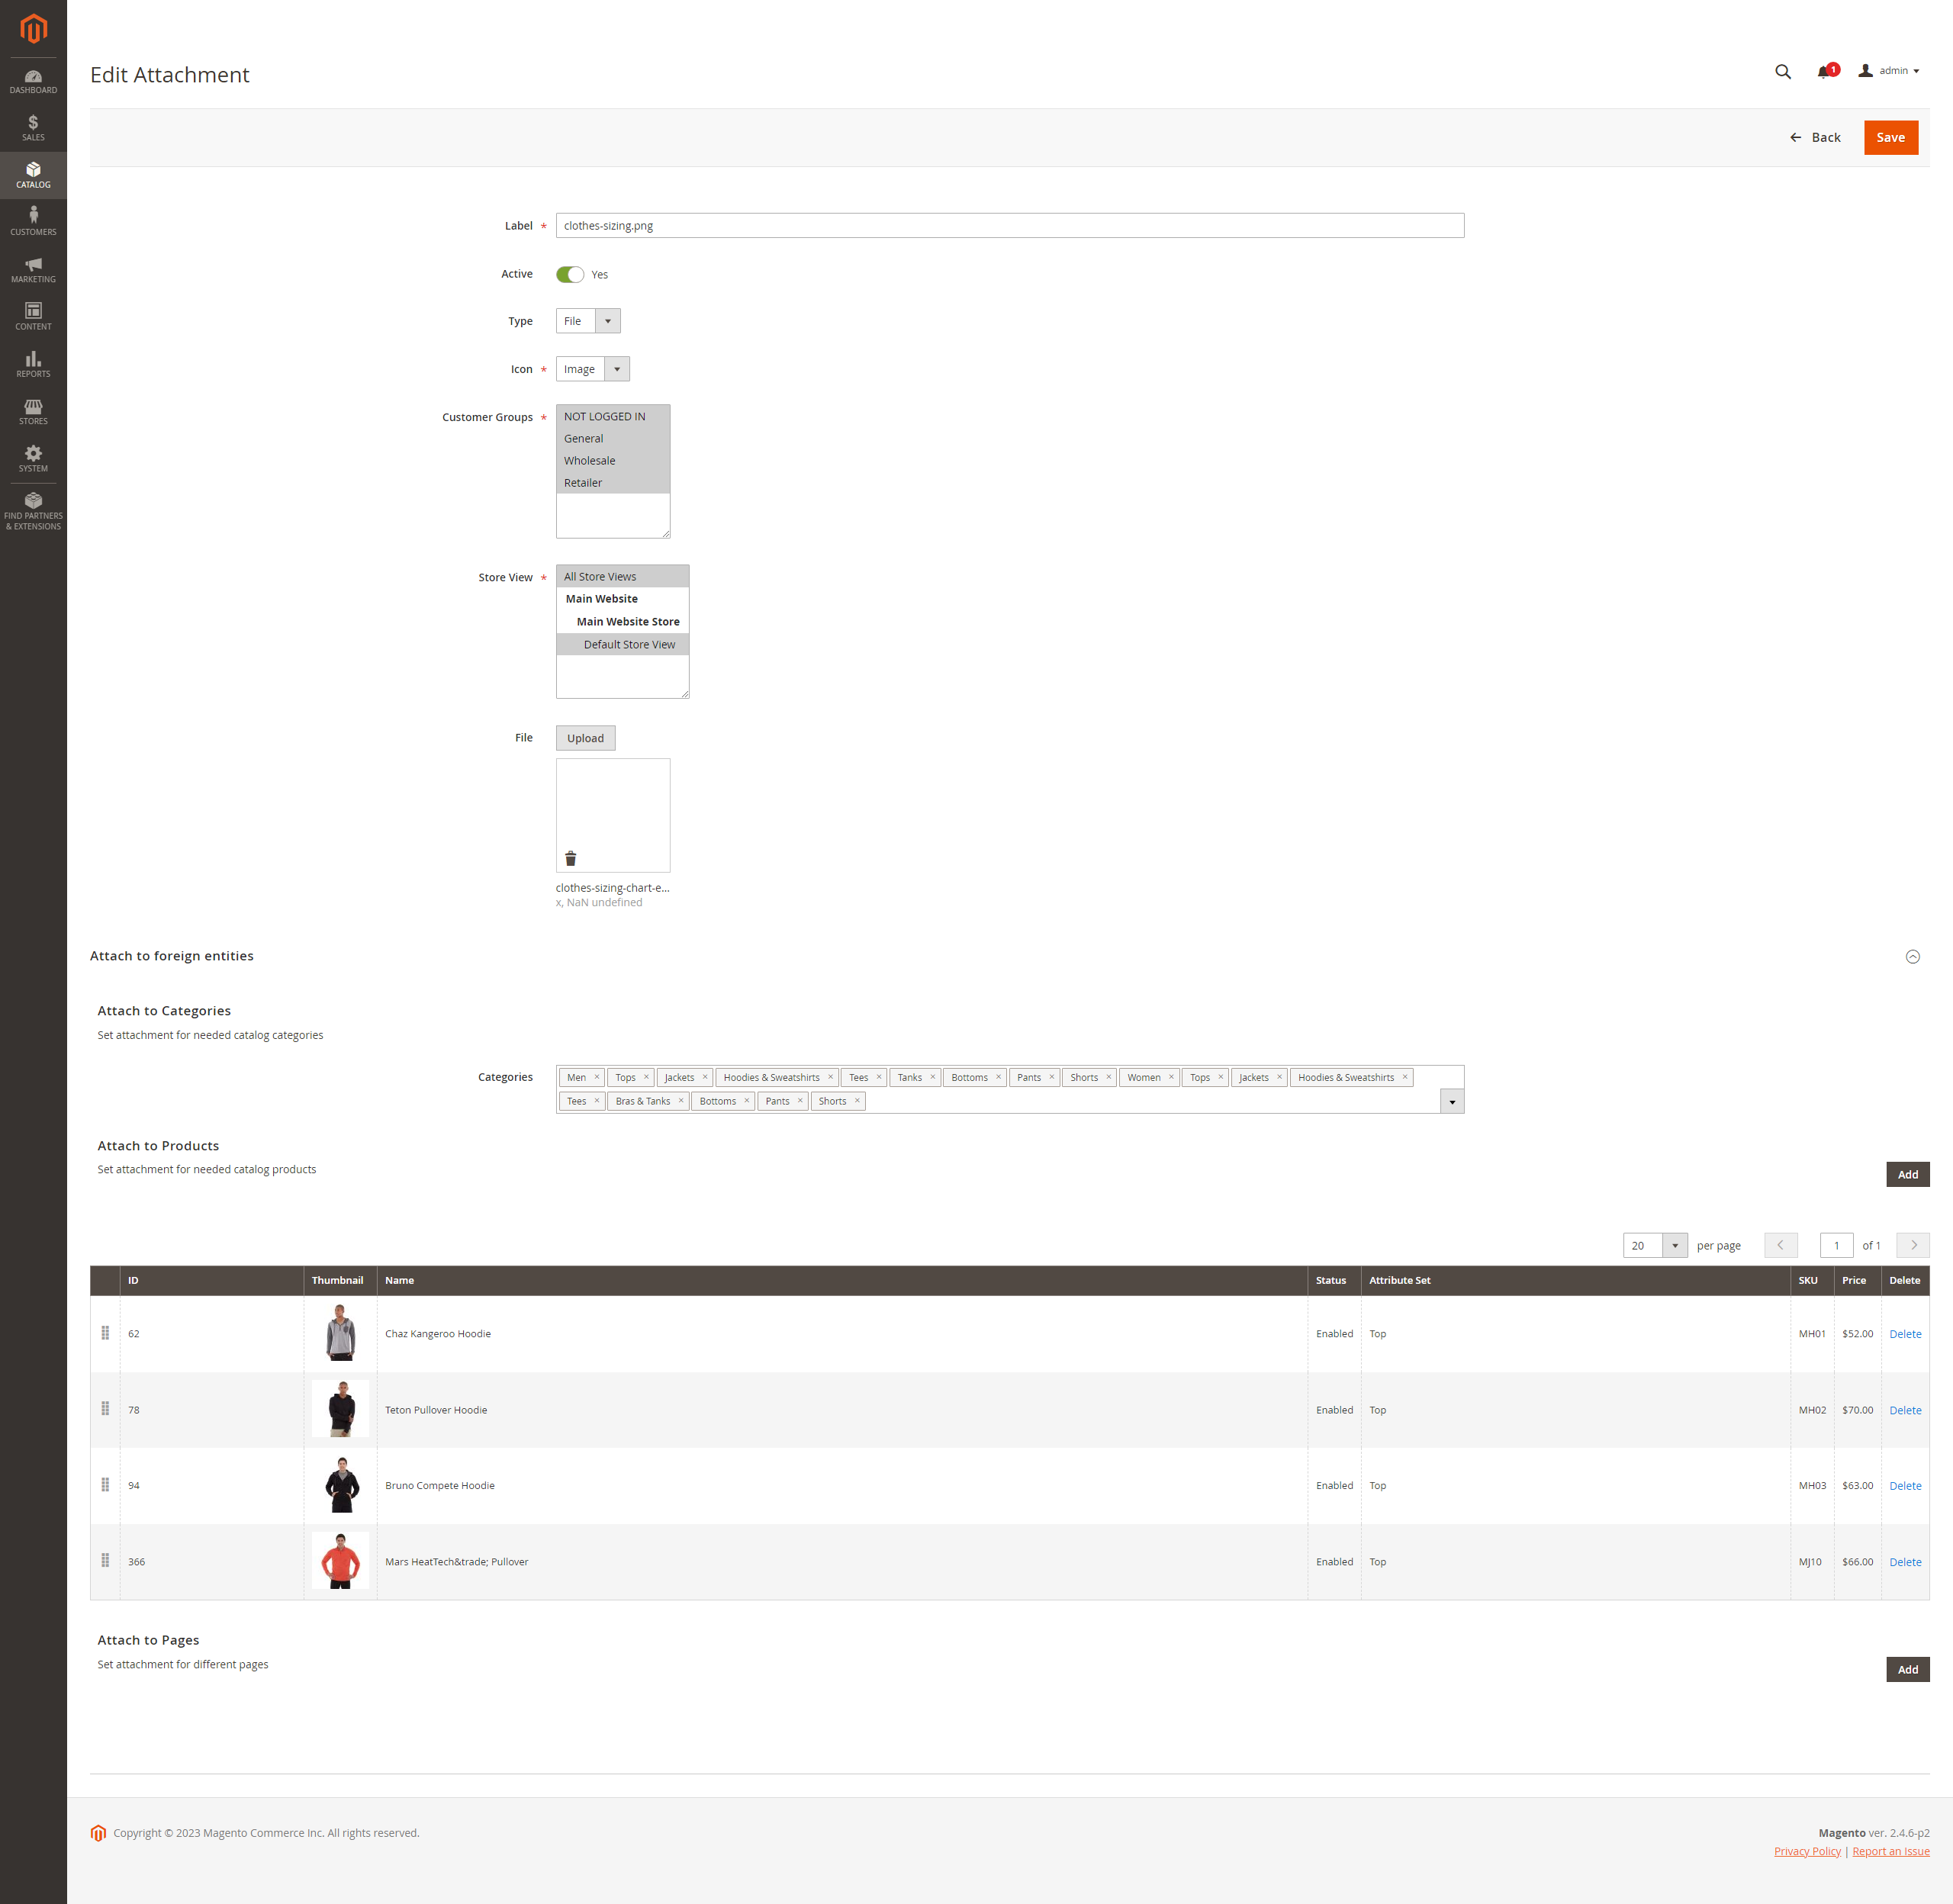
You’ll be redirected to the product attachment management form page after any of these actions performed:
Attachment Form
Attachment management form consists of 2 main fieldsets:
General
Attach to foreign entities
General fieldset in turn has the following fields:
Label - The name displayed on the storefront.
Active - Determines whether the attachment is shown.
Type - Attachment type. Currently, 2 types are supported: file, link.
Icon - File icon (Select from Attachment Icons, which were described before).
Customer Groups - Groups of customers for attachment being shown to.
Store View - Assign attachment per store.
File - Shown in case file attachment type is chosen. Allows to upload a needed file. The SVG file extension is supported.
Url - A URL builder allowing to simply configure needed url. Is shown only for link attachment types.
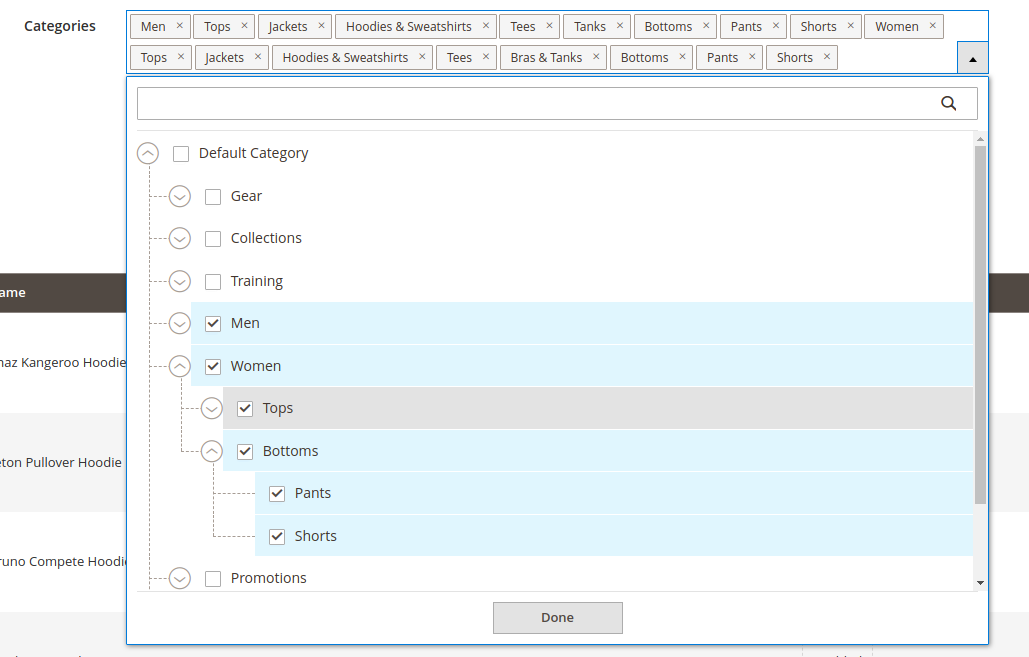
Attach to foreign entities fieldset gives merchant an ability to simply assign attachment
to various places without the need of going through numerous pages looking for assignment place.
It has the following settings:
Attach to Categories - Multiple categories select for assigning attachment to many categories simultaneously.
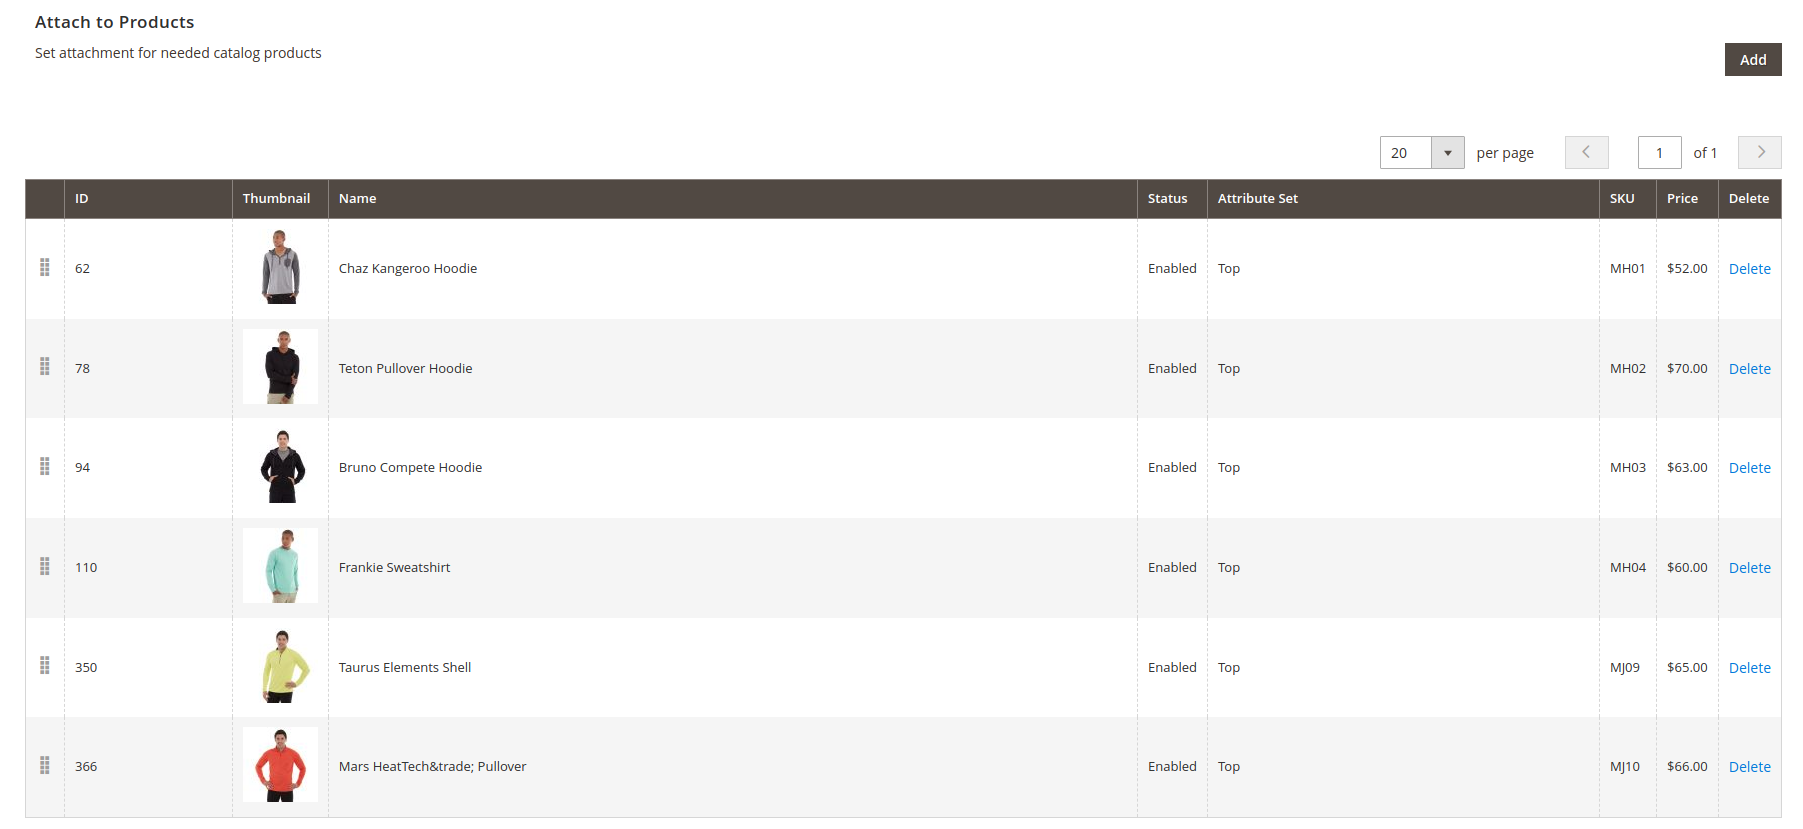
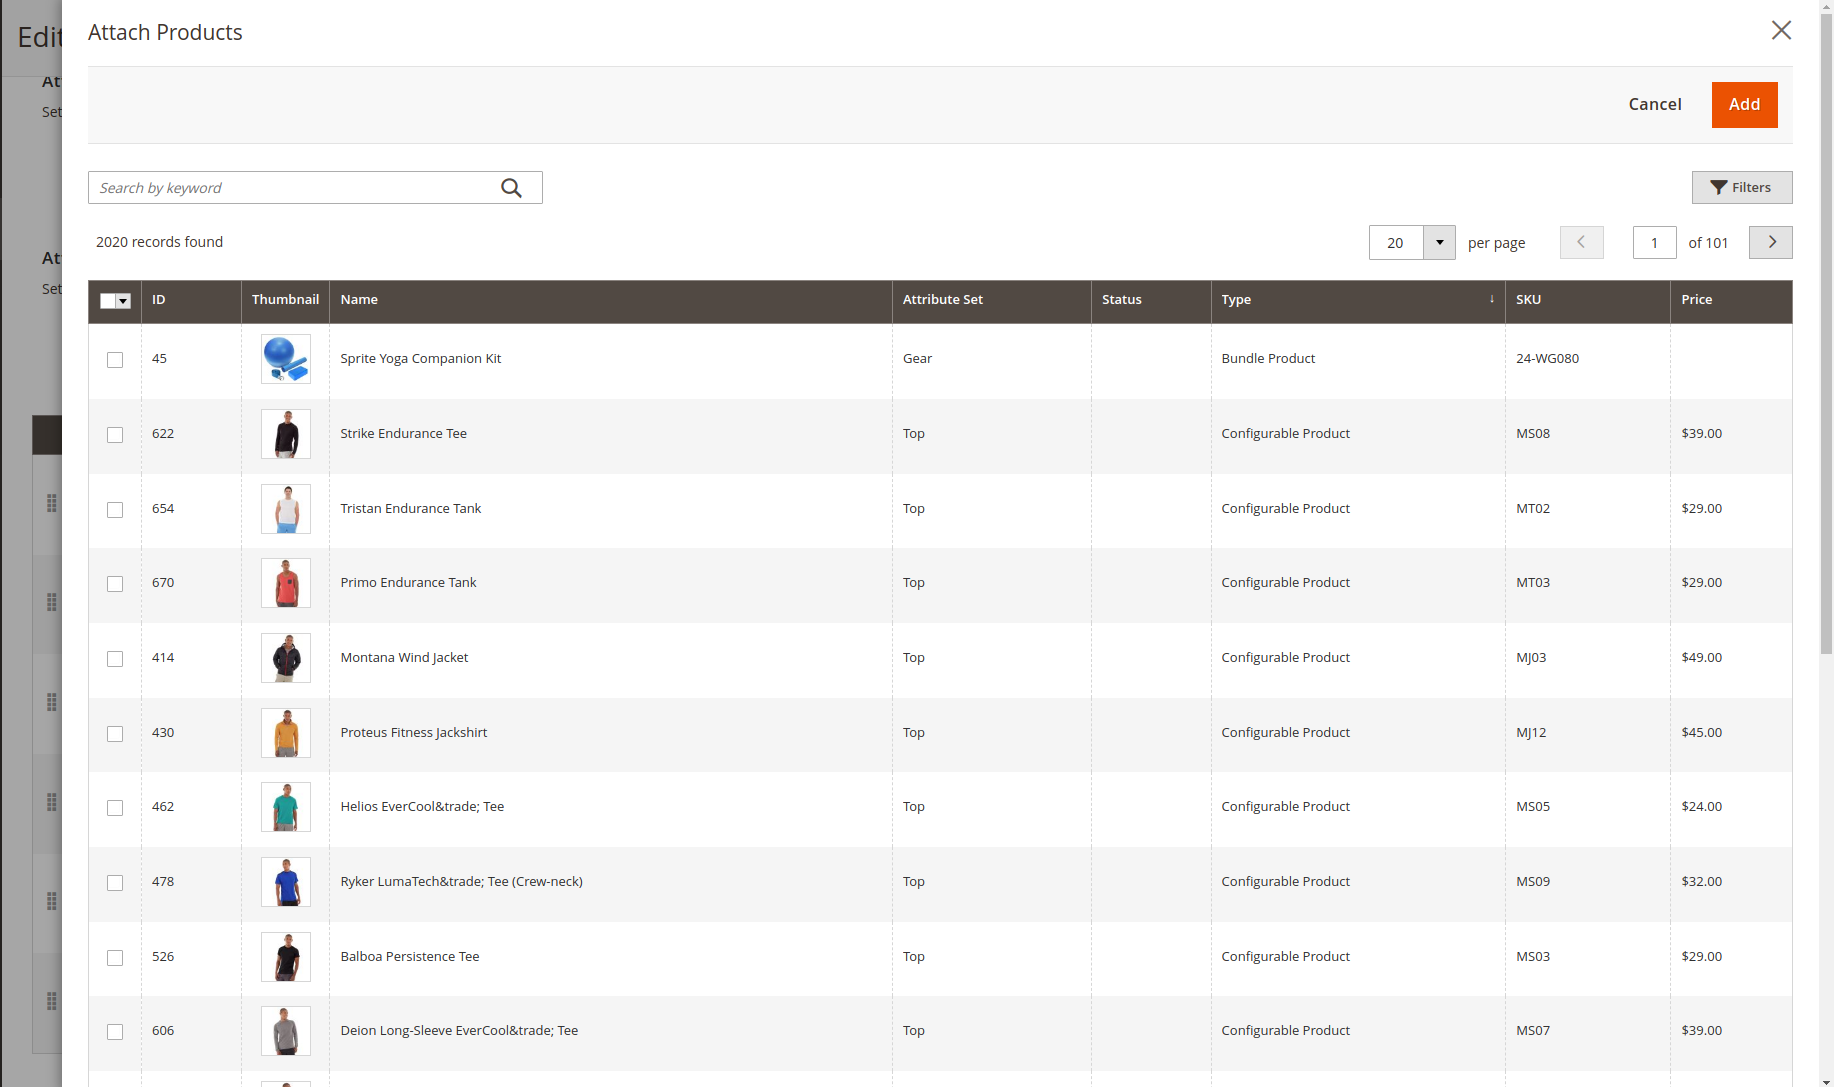
Attach to Products - List of products with the ability to simply add new ones. Click on the Add button
to add new ones:
After the click modal window opens allowing to choose other products. Click Add once all needed
products were chosen:
Attach to Pages - Similar functionality as with products but allows to assign attachment to needed CMS pages.
Widget
There is also a CMS Widget available for showing custom set of attachments in any place.
Its configuration consists of the next options:
Label - Title for block with the group of attachments.
Show Icon - Determines whether to show attachments icons.
Show Filesize - Determines whether to show attachments files sizes.
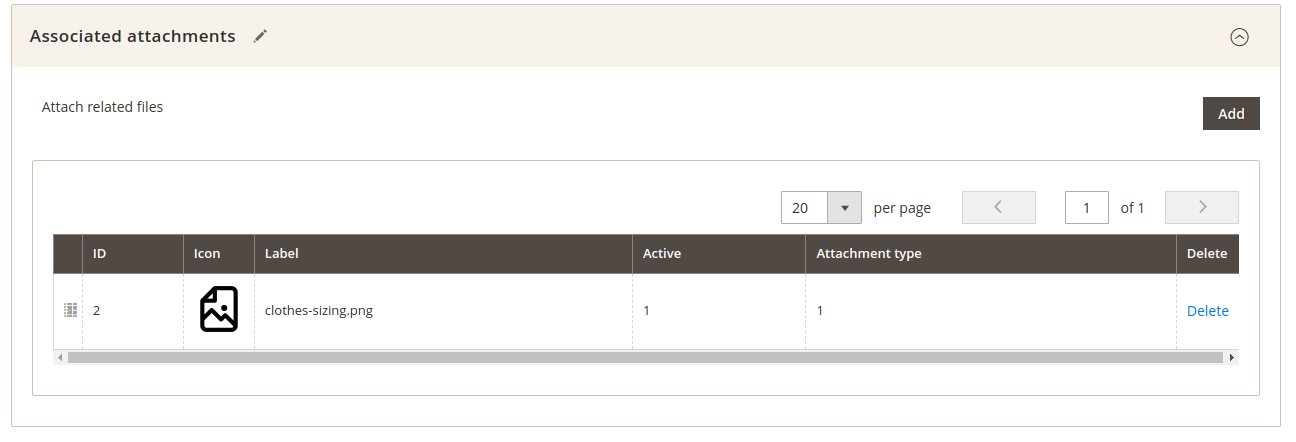
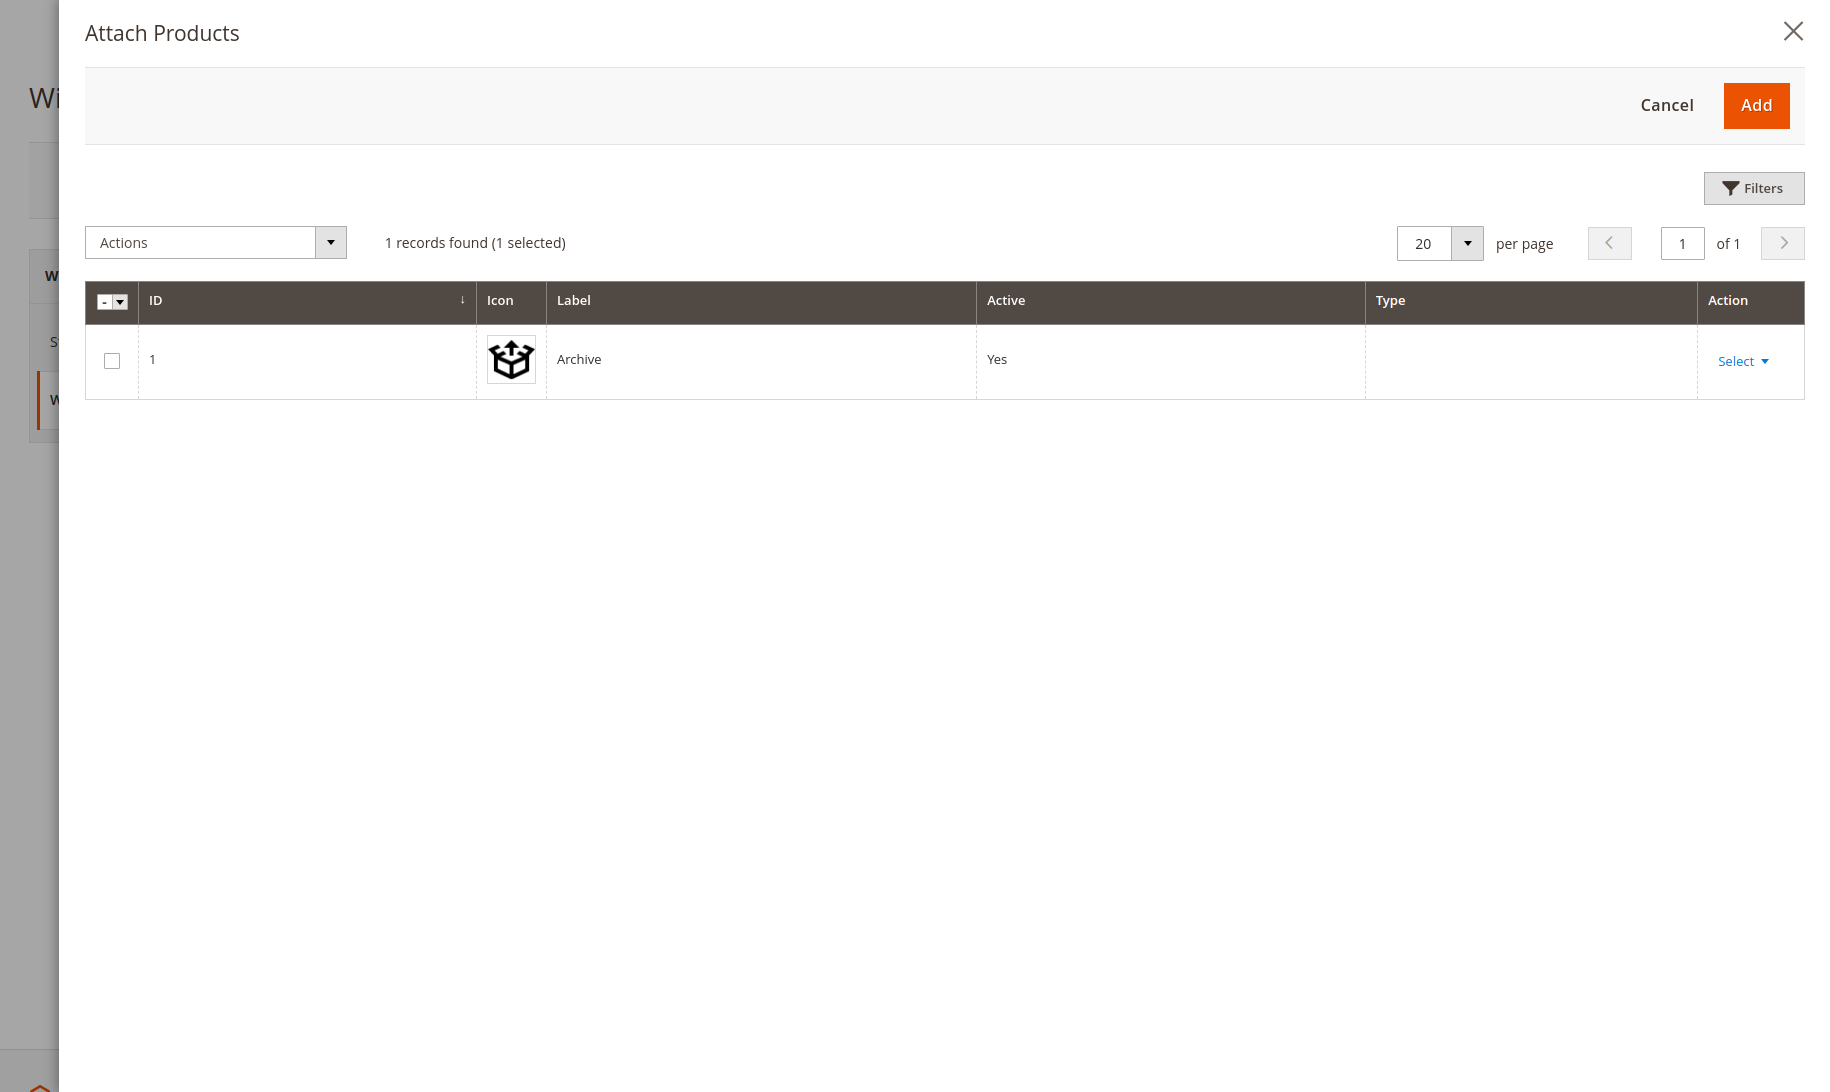
Associated attachments - Allows to add attachments in convenient way.
Click Add button to open modal with attachments listed
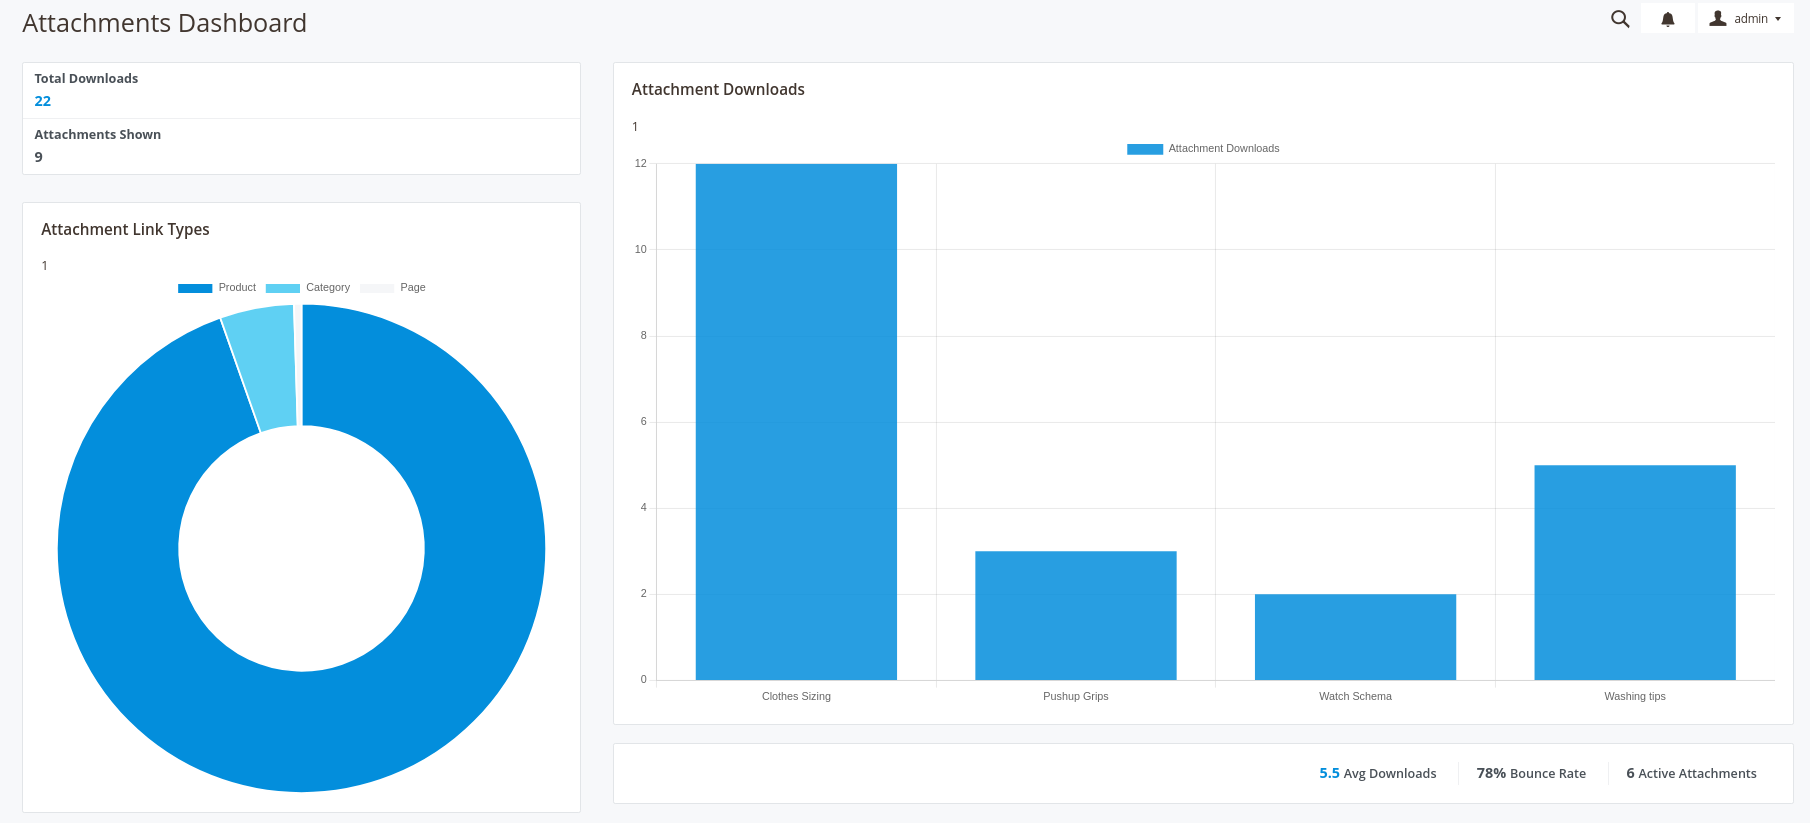
Analytics
A range of information is collected about every attachment like attachment downloads,
number of attachments shown per page, etc. This statistics is then reflected in fancy way
on the Reports ➔ Marketing ➔ Attachments Dashboard page: