There are many malicious bots and types of automated attacks in the digital realm today. Therefore, websites need protection against these threats to ensure uninterrupted operations and prevent disruption of purchases. It is for these purposes that Google reCAPTCHA exists.
Users of the Magento 2 platform can easily use it by default. However, the default functionality is not comprehensive and does not provide all the necessary features for full site protection.
The Profstep Google reCAPTCHA Add-on extension will extend the existing functionality and provide more convenient ways to configure this protection system.
Embark on an exploration of our extension demo, where you can test its
features firsthand and unlock its full potential. Dive into a world of
possibilities as you navigate through the demo, discovering how our extension
can enhance your experience.
Profstep Google reCAPTCHA Add-On customizes frontend protection options, and it won’t work without default Magento 2 reCAPTCHA credentials setup.
Go to Stores ➔ Settings ➔ Configuration ➔ Security ➔ Google reCAPTCHA Storefront to Google reCAPTCHA.
Before using our additions, manager needs to configure reCAPTCHA credentials for type which he will use.
In the same time, website can be protected by 3 reCAPTCHA types:
reCAPTCHA v2 (‘I am not a robot’) - A validation flag will be inserted into protected forms.
reCAPTCHA v2 Invisible - A special badge will be displayed on the page or inside the forms, and suspicious form submissions will be checked by a special task.
reCAPTCHA v3 Invisible - This is a security solution that works discreetly in the background, assessing user interactions with websites and assigning risk scores.
After reCAPTCHA configuration, manager can use Profstep Google reCAPTCHA Add-On. Go to Stores ➔ Settings ➔ Configuration ➔ Security ➔ Google reCAPTCHA Storefront ➔ Profstep reCAPTCHA Add-on.
Here manager can configure captcha omit conditions and custom forms that must be protected. In addition, to make managing captcha forms easier, the manager can turn on developer mode.
General settings
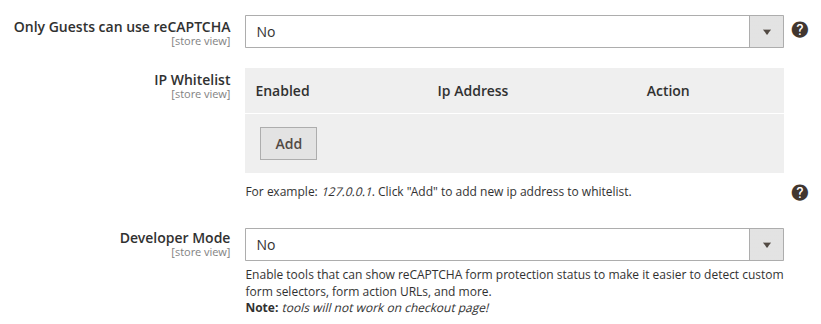
Only Guests can use Invisible Captcha - Choose “Yes” to enable reCAPTCHA protection only for non-authorized customers.
IP Whitelist - Specify a list of trusted IP addresses that will not pass the reCAPTCHA check. Manager can easily enable/disable options for convenience to avoid deleting record.
Developer mode - Choose “Yes” to enable developer mode on the frontend. The manager will then see a special button to activate developer tools on the page.
Forms protection settings
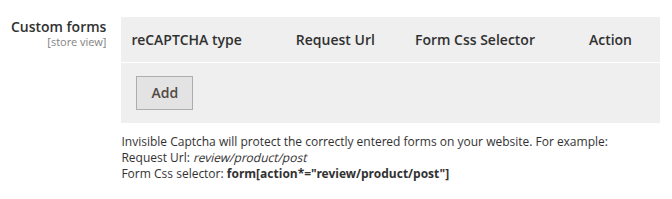
Custom Forms - Specify a list of non-configurable forms by default that should be protected by one of the 3 types of reCAPTCHA.
Setup Custom Forms protection on Frontend
To protect custom forms that are not specified in Stores ➔ Settings ➔ Configuration ➔ Security ➔ Google reCAPTCHA Storefront ➔ Storefront, go to appropriate settings in reCAPTCHA Add-On.
Click on Add button to create a new record.
Select one of reCAPTCHA types or No to disable record.
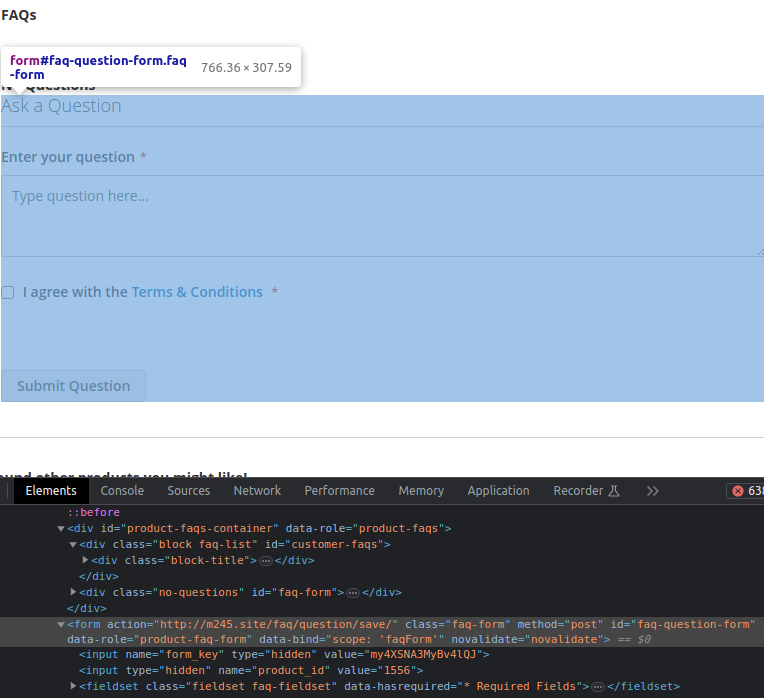
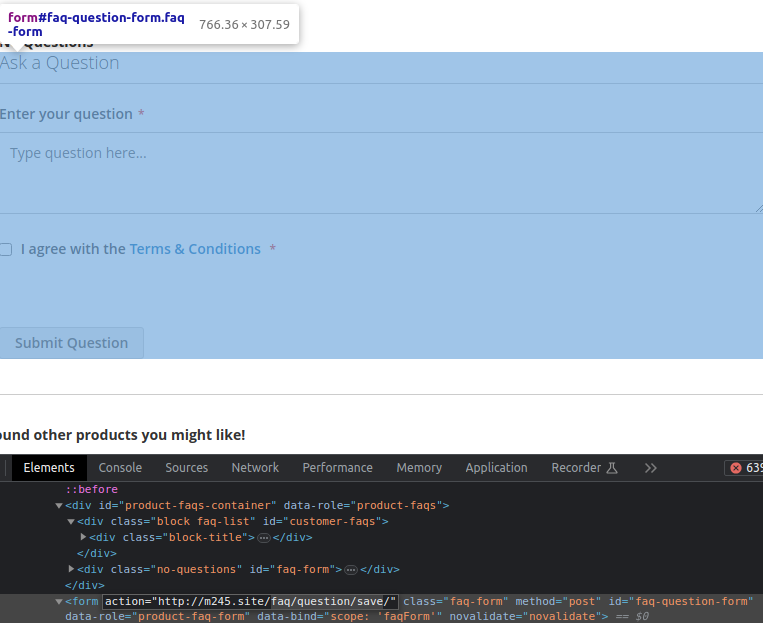
Go to the page where the necessary forms for protection are available.
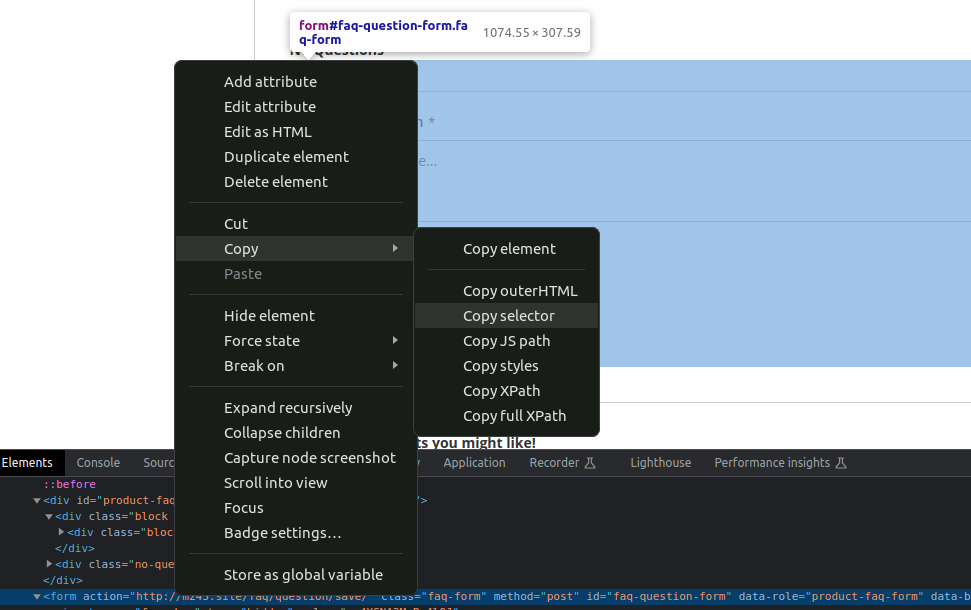
Right-click the form and select “Inspect.” Then, find the form tag of the desired form.
Right-click on the tag and select Copy ➔ Copy Selector to copy the form selector, then paste it into the Form
CSS Selector column in the created row.
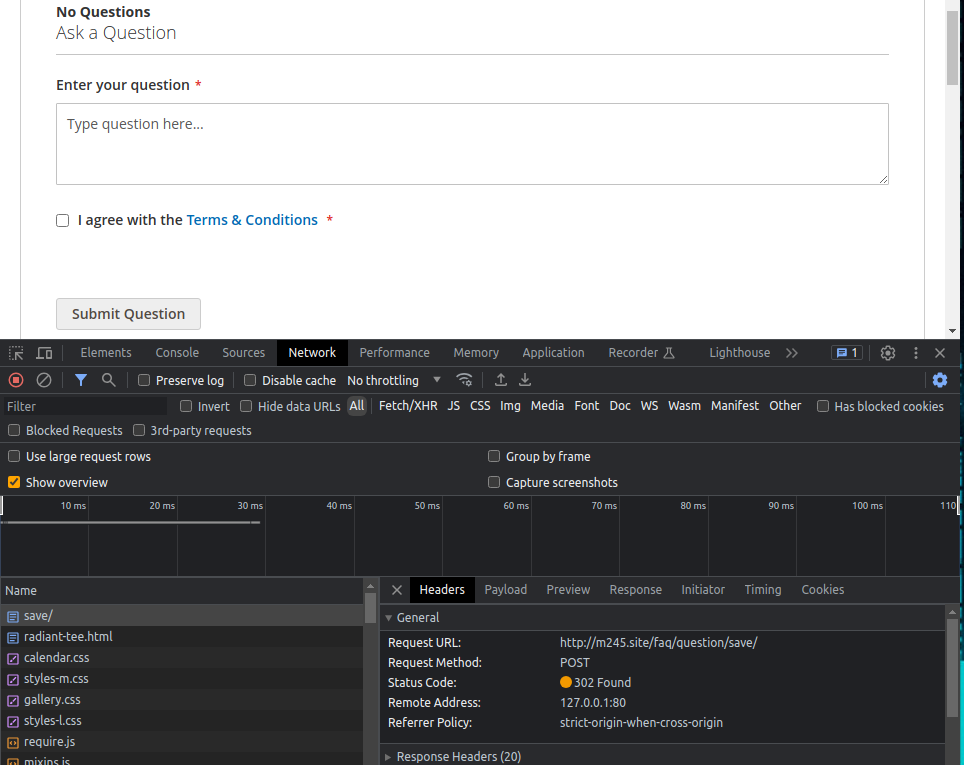
After that, check if the form tag has an action attribute. If it does, copy the path after the domain name
and paste it into the Request URL column in the created row.
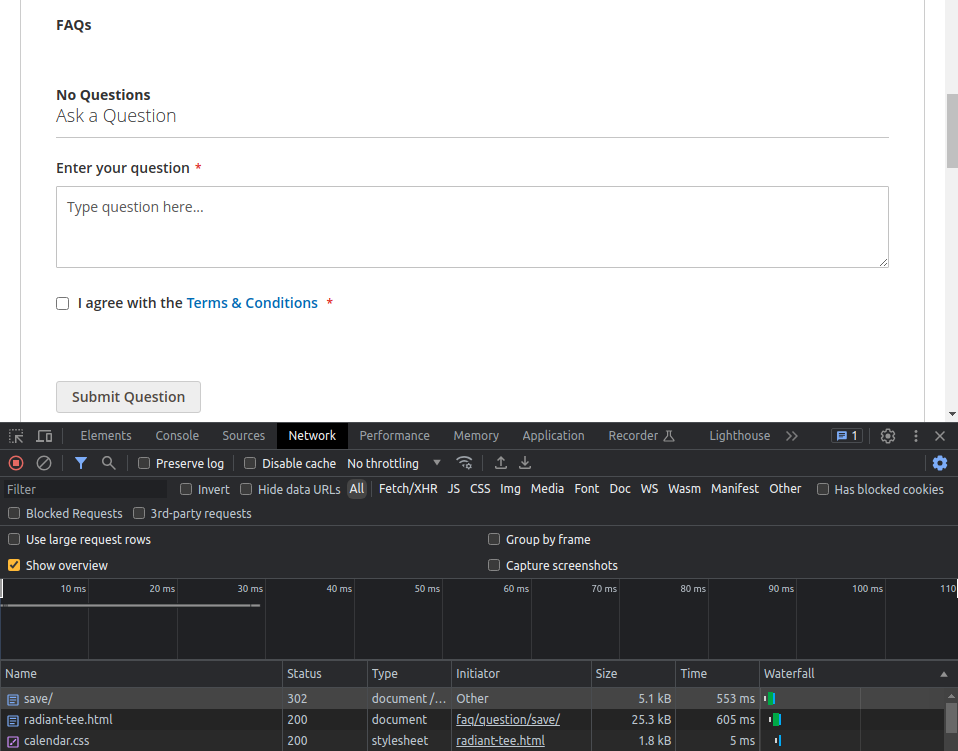
If the form tag doesn’t have an action attribute, fill out the form and submit it using the open Developer
Tools window.
In the Network tab, search for a record with a 302 status. This will be our target Request URL.
Then, click on the record, go to the Headers tab in the newly opened section, and copy the path after the
Request URL property.
Click the Save Configuration button and flush the Magento 2 Cache to apply reCAPTCHA protection to the
forms.
Developer mode
To make adding custom form protection easier, the developer can activate a special mode. This lets them view all forms available for protection on the frontend. The admin can also see default forms with their protection status and custom forms with possible settings like the form action path and form selector.