The Geo IP Extension for Magento 2 enhances your online store by automatically detecting the geographical
location of website visitors. Accordingly, it will enable managers to block or allow access to the
website, change the language or currencies depending on customer location, apply special restrictions
for certain groups of customers, etc.
This powerful tool ensures a personalized and efficient shopping
experience, increasing customer satisfaction and conversion rates.
Embark on an exploration of our extension demo, where you can test its
features firsthand and unlock its full potential. Dive into a world of
possibilities as you navigate through the demo, discovering how our extension
can enhance your experience.
First of all, before starting to use extensions, the administrator must register with Max Mind service
and generate a special API token to use the IPs databases.
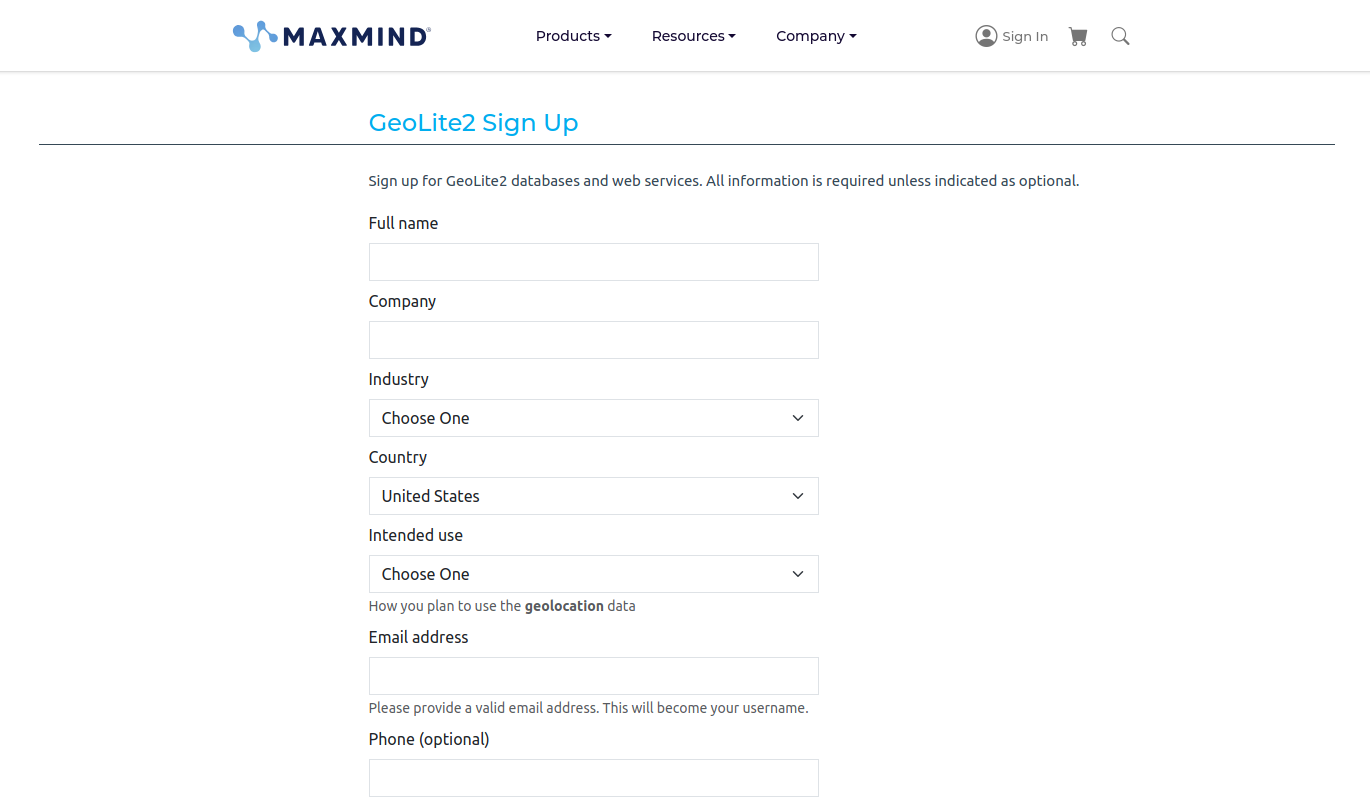
To create an account in this IP data provider, go to the Sign Up page.
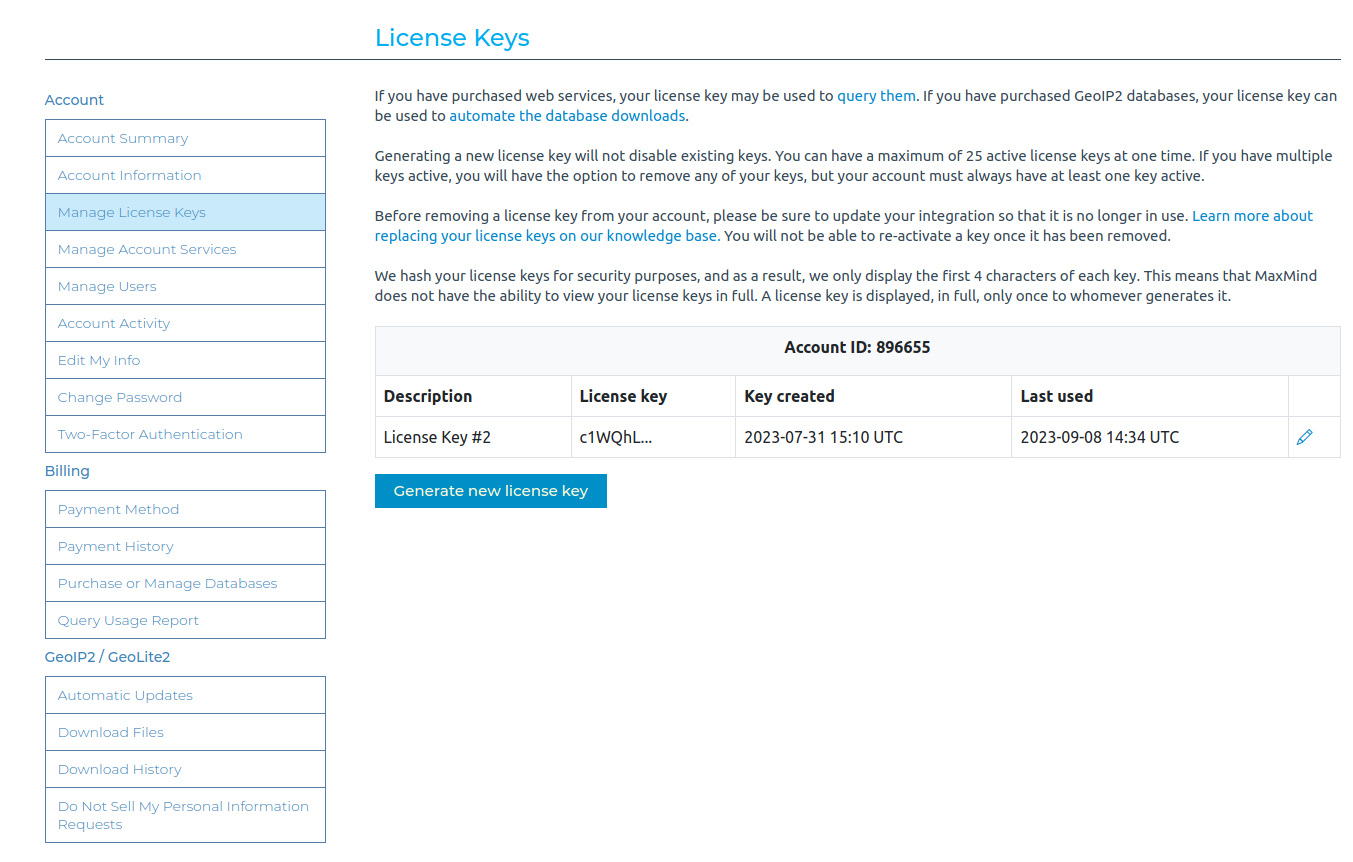
Then, go to Account page ➔ Manage License Keys tab.
Click on Generate new license key button.
How to use
GeoIP extension for Magento 2 uses Max Mind
databases to locate customers. Consequently, managers need to download databases for the extension to work properly.
Almost the entire functionality and configurations are located on Stores ➔ Settings ➔ Configuration ➔ Profstep tab.
Basic extension setup
To enable the module, select Yes value for field Enable Module in Stores ➔ Settings ➔ Configuration ➔ Profstep ➔ GeoIP settings ➔ General fieldset.
When the module is enabled, the manager needs to select a database provider. If the website uses CloudFlare as a cdn, you can choose Cloudflare IP geolocation to determine the country code from the cdn headers.
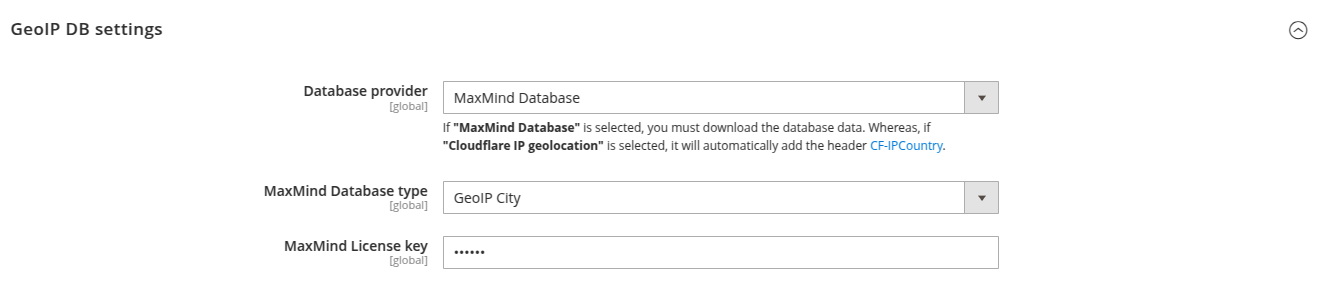
If managers want to use Max Mind and have received a license key, they need to set up credentials for the database API.
To perform this, go to Stores ➔ Settings ➔ Configuration ➔ Profstep ➔ GeoIP data ➔ GeoIP DB settings and enter the key in the Max Mind License key field.
In addition, choose one of the available DB types for more accurate customer location:
Country - detect the user’s country by analyzing their IP address.
City - more accurate detection of the customer’s country based on regions and cities.
For database updates or the first download, go to Stores ➔ Settings ➔ Configuration ➔ Profstep ➔ GeoIP data ➔ Download Data and click on the button labeled “Download DB”. Then, the entire fetching process for new databases will be displayed.
If managers want to save a copy of the current database, check the Create backup of downloaded files option.
How to configure
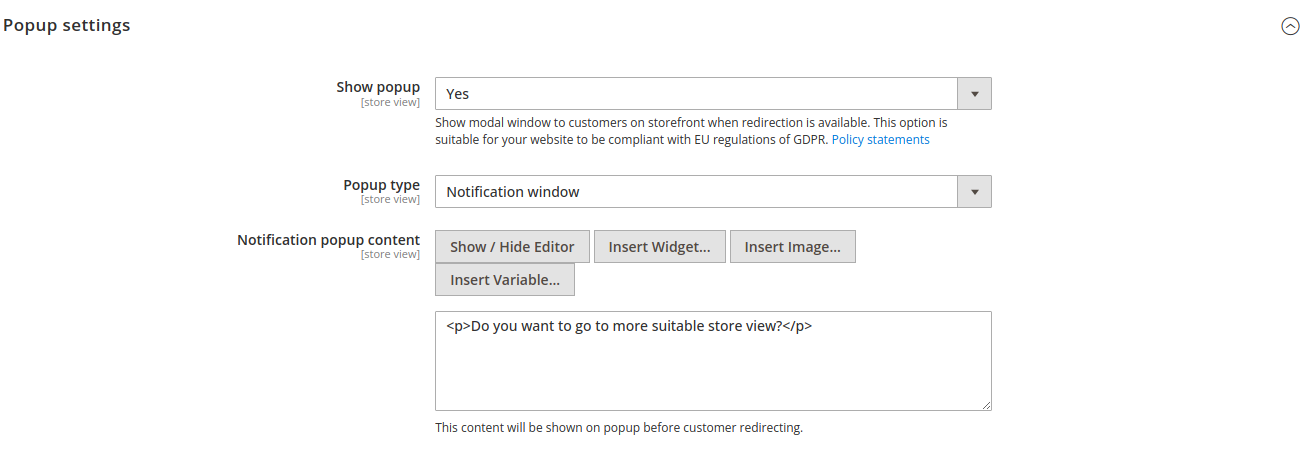
Popup settings
Show popup - Choose “Yes” to show a popup if the visitor follows the selected rules.
Popup type - Choose one of the following window types:
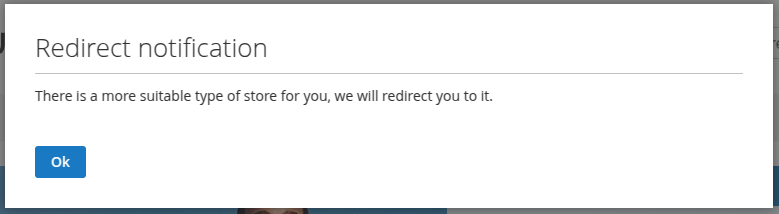
Notification window - a window that informs users about redirection to another page.
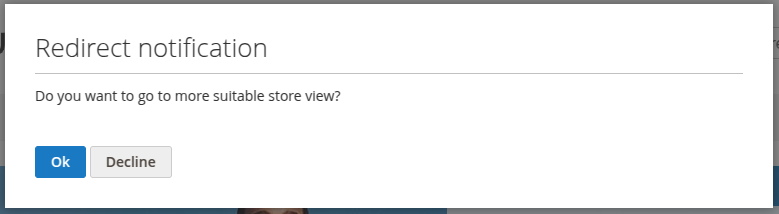
Confirmation window - an info window with “Ok” or “Decline” buttons to confirm redirection to another site.
Confirmation/Notification popup content - Content that will be shown inside the redirect window. Managers can put images and variables here.
The field supports Magento 2 directives.
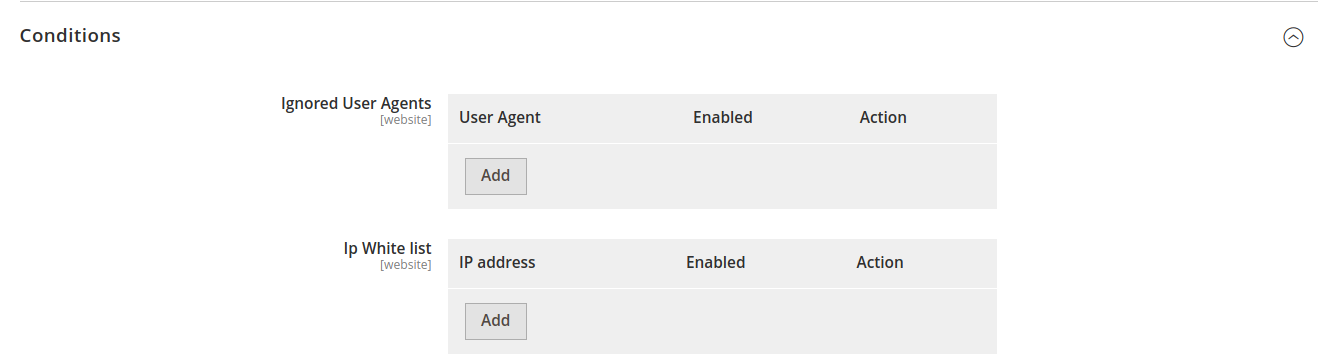
Conditions
Ignored User Agents - A dynamic row to ignore redirects based on client user agents. This field can be helpful if you want to apply restrictions for customers with specific browsers.
User Agent - user agent label, e.g., Mozilla/5.0 (Windows NT 6.1; Win64; x64) AppleWebKit/537.36 (KHTML, like Gecko) Chrome/130.0.6527.189 Safari/537.36
IP Whitelist - A dynamic row to ignore redirects based on IP addresses. This field contains IP addresses which will
ignore restriction conditions.
Apply restrictions to - Select one of the options below to apply the redirect to:
Specific URLs - All restrictions will only apply to the mentioned URLs.
Except URLs - All restrictions will be applied to every page except the specified URLs.
Home Page - Restrictions will only apply to the home page.
Specific/Excepted URLs - URLs that will be used with the previous configuration.
Redirect For the First Visit - Select “Yes” to apply restrictions only to the first visit to the site.
Ignore Lists
IP Blacklist - A list of IP addresses that will be redirected to the page chosen below.
Country restrictions - A list of blocked countries.
CMS page for restricted customers - Select the CMS page to which users are redirected, who meet the conditions in this group.
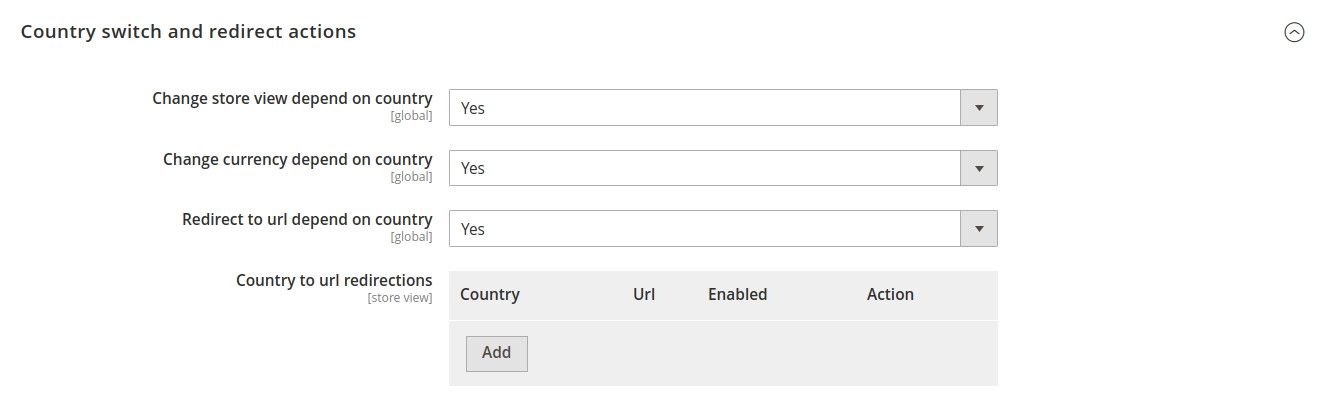
Country switch and redirect actions
Change store view depending on the country -
Select “Yes” to enable redirection to the selected store view based on the visitor’s country.
This can be configured in Stores ➔ GeoIp ➔ Store View to Countries and the Store View to Countries link will be shown if the “Yes” option is selected.
Change currency depending on the country - Select “Yes” to change currency depending on the country using created mappings.
This can be configured in Stores ➔ GeoIp ➔ Currency to Countries and the Currency to Countries link will be displayed if the “Yes” option is selected.
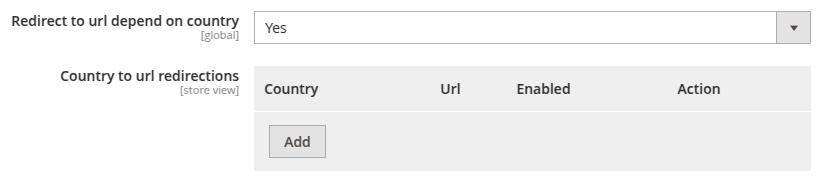
Redirect to URL depending on the country - Select “Yes” to redirect users to specific URL depending on country mappings.
Country to URL redirections - Mappings to redirect customers from specific countries to other URLs.
Administration and Debug
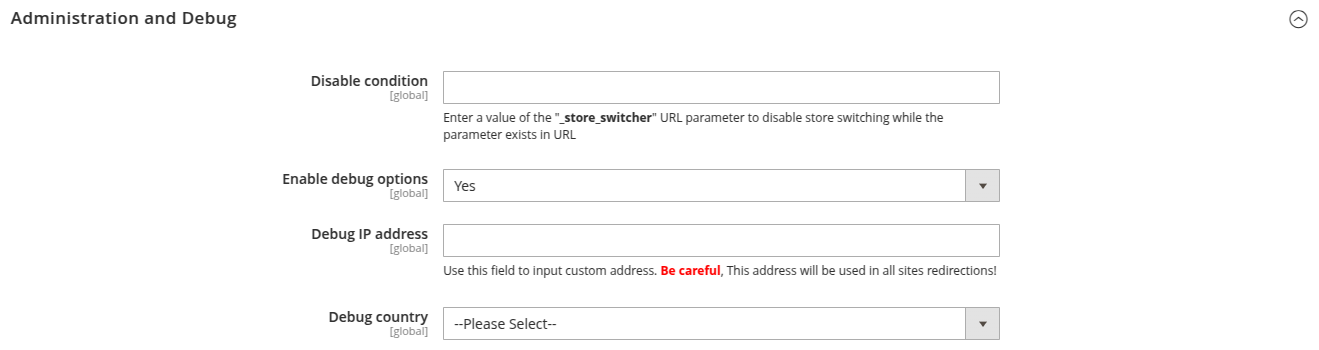
Disable condition - Enter the value that users must enter for the _store_switcher URL GET parameter to disable redirections.
Enable debug IP address - Choose “Yes” to show the Debug IP address field.
Debug IP address - Enter the IP address that will be used instead of the visitor’s URL address. This field is used only for debug purposes!
Debug Country - Replaces your determined location country with the value from this field.
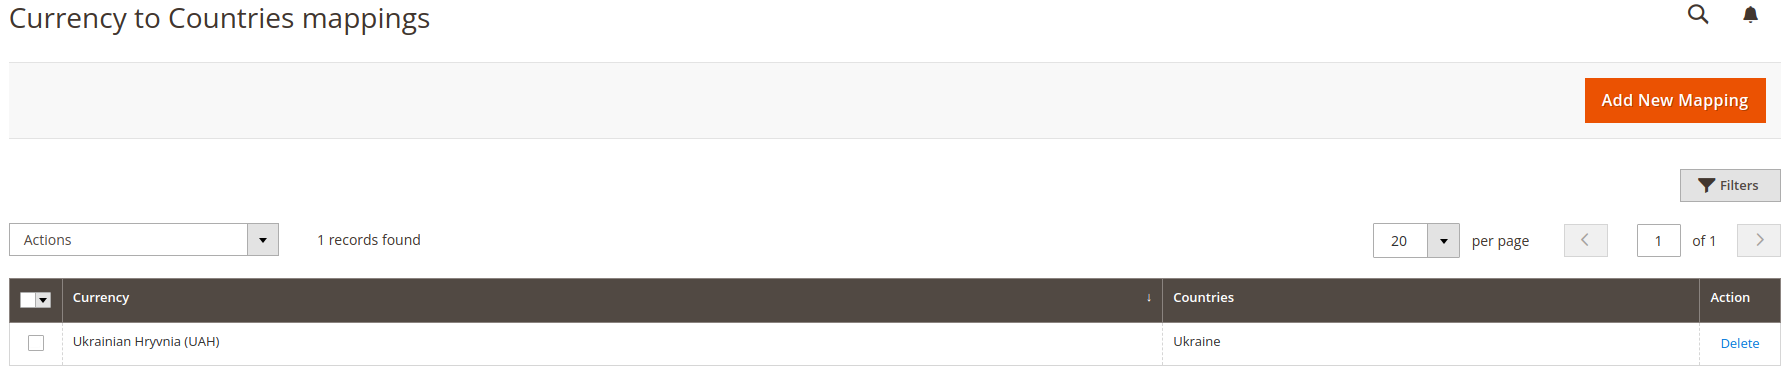
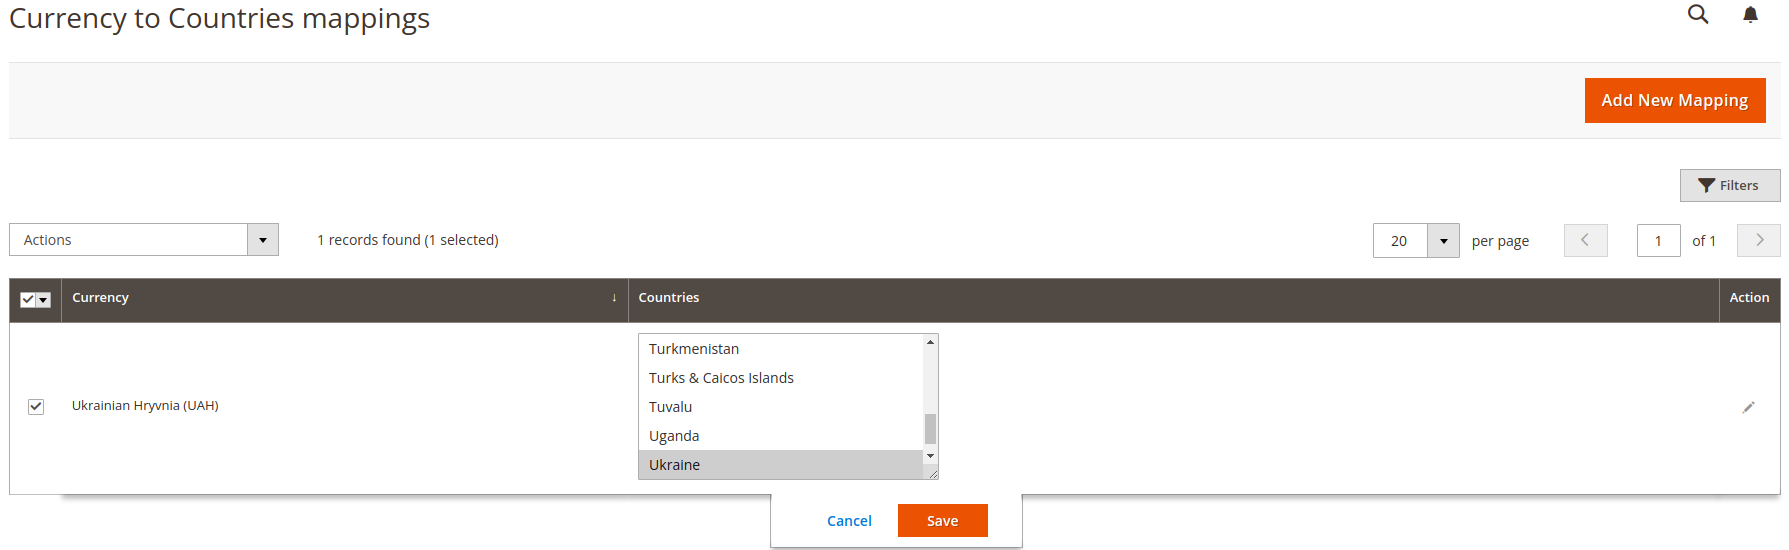
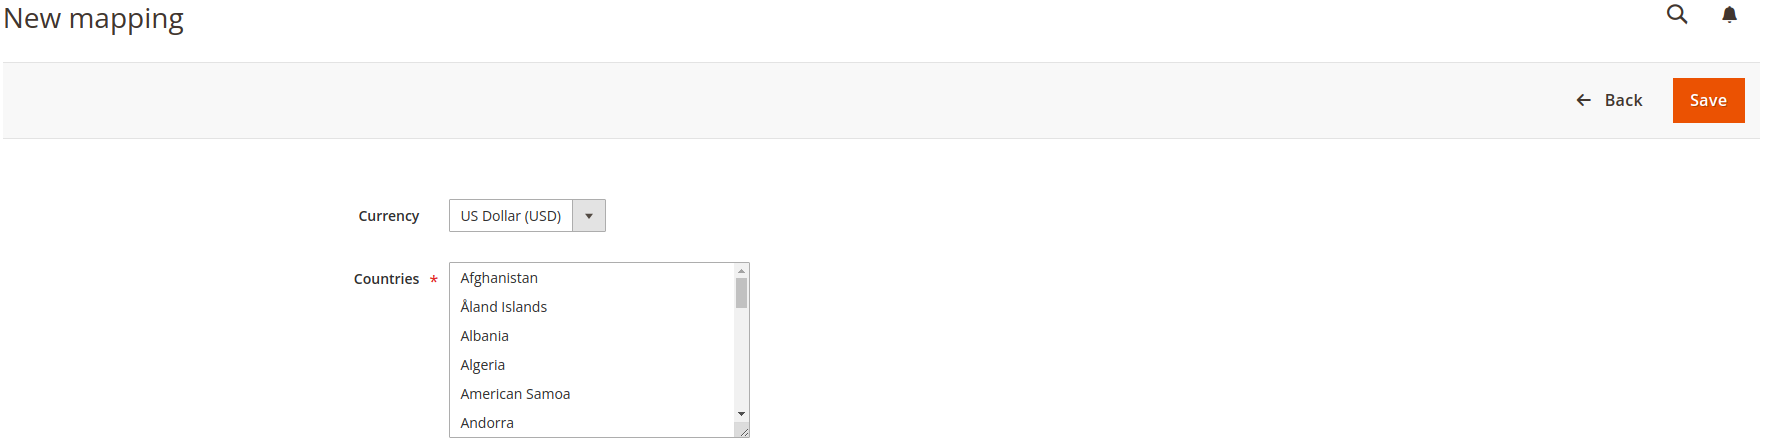
Currency to Country Mappings
This mappings table is both a list and editor for currency mappings. Administrators can create mappings or edit them to change currency depending on the country. To edit mappings, click on the appropriate row and change countries.
When managers want to add a new currency and relative mapping, they need to click on the Add new Mapping button. Then, they can choose one of the following currencies that don’t have mappings and appropriate countries for them.
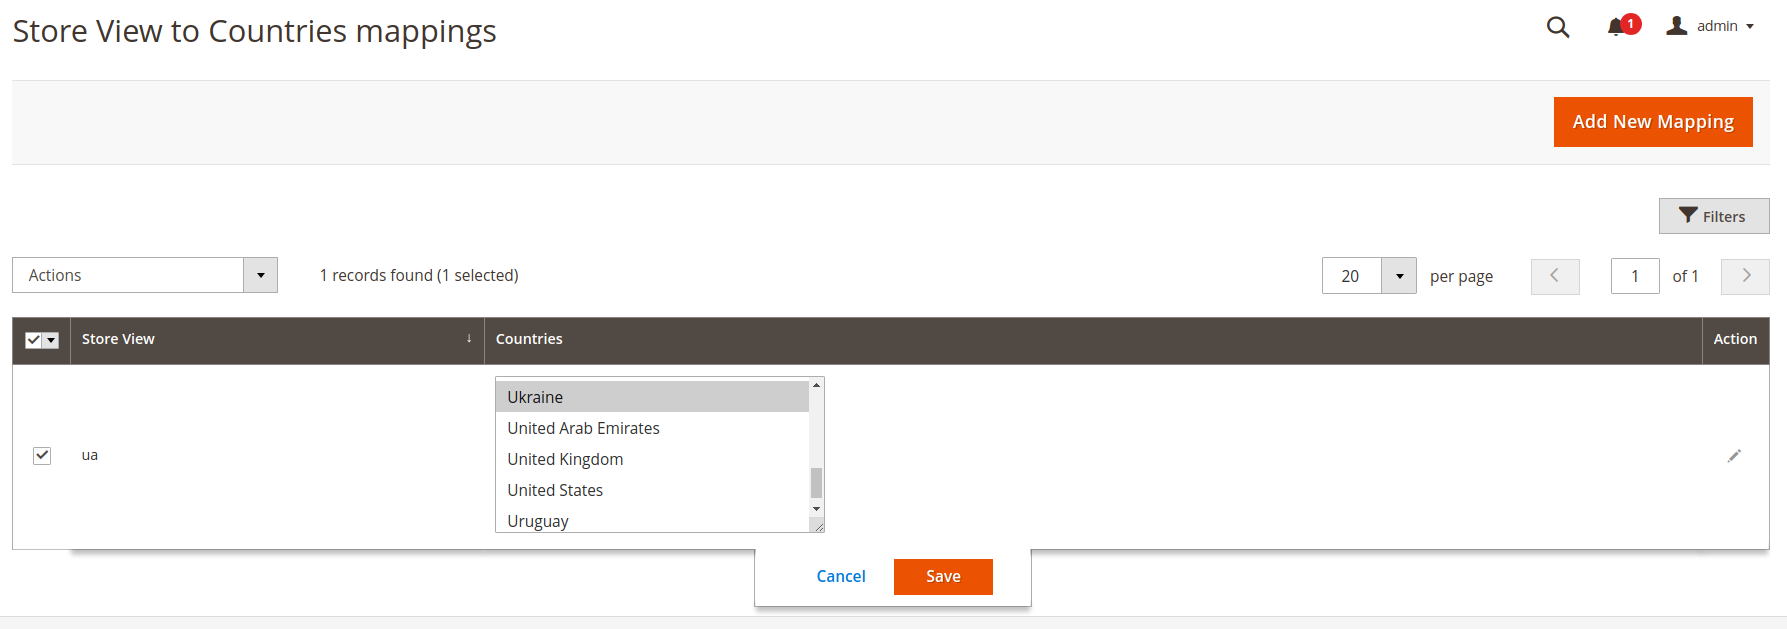
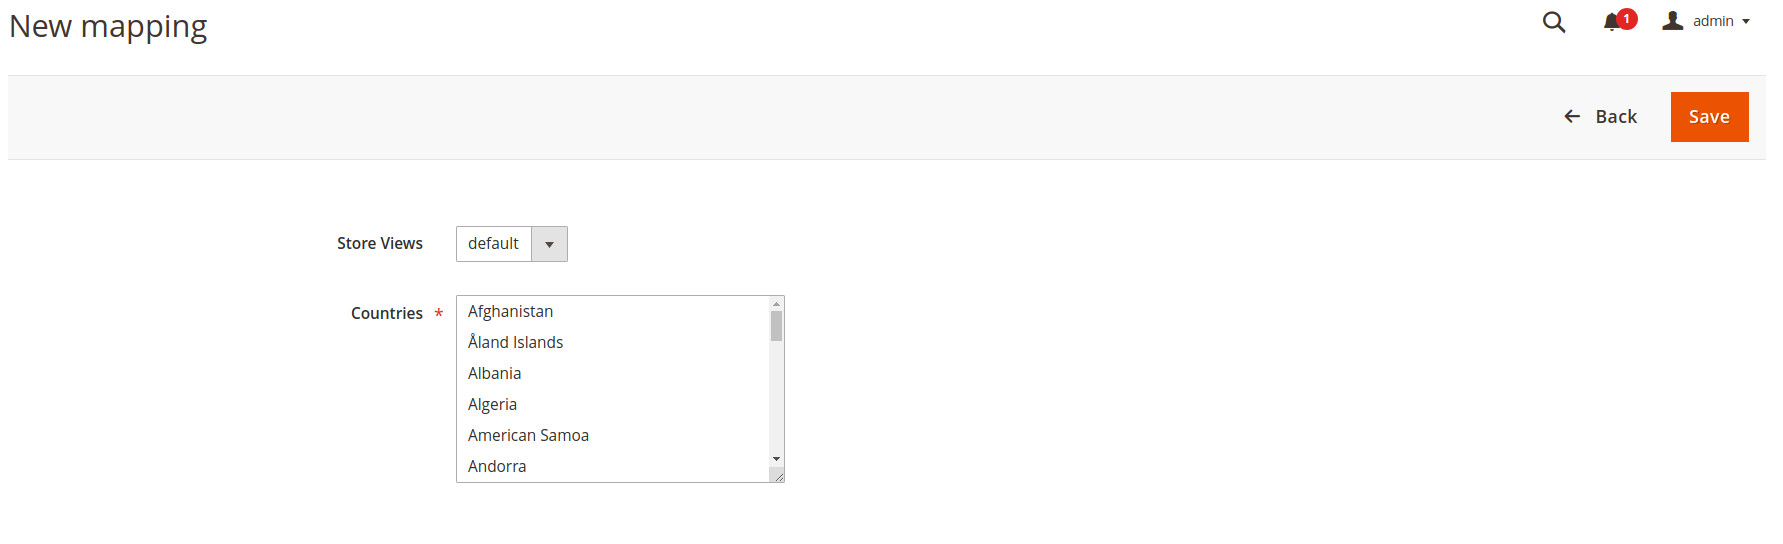
Store View to Countries Mappings
This mappings table is both a list and editor for store view mappings. Administrators can create mappings or edit them to change store view depending on the country. To edit mappings, click on the appropriate row and change countries.
When managers want to add a new store view redirect and relative mapping, they need to click on the Add new Mapping button. Then, they can choose one of the following store views that don’t have mappings and appropriate countries for them.